Adjusting the playback speed
Choose the speed suitable for your analysis. Adjust from 0,5x to 2x.
Learn how to set up and use UXtweak
Explore possibilities with demo studies and results

Export and analyze insights faster. Sync your favorite tools with UXtweak
Resources for mastering research, design and product
Definitions of UX terms and phrases
UX insights and tips to sharpen your skills

Studies published in peer‑reviewed journals and industry publications.
Watch our quick, educational UX videos
Listen to top researchers share their stories, wins, lessons
The main step in analyzing an interview is actually rewatching it. This section covers how to:
Play back the interview recording. Use the timeline to jump to a specific section. Jump ahead or back in 10s skips. You can also adjust the playback speed of the recording.

Choose the speed suitable for your analysis. Adjust from 0,5x to 2x.
A key step in every analysis is writing good notes and creating representative highlights. The notes seen in the recording player are the same as the notes created by Moderators and Note-takers throughout the call. You can edit them, remove them, and add new notes as well.
Highlights help you save the most important moments from the interview. They can be watched directly in the results of your study, or exported in MP4 format.
You can create highlights manually, or use AI to suggest highlights from the recording.
To create a highlight, convert a note into a highlight using the Make highlight button. Set the starting timestamp and ending timestamp to define which part of the recording should be included.
Notes and highlights support formatted text, so you can make your analysis easier to scan by using formatting such as bold text, links, or bullet lists.

To create a highlight, click Add note or highlight, choose Highlight, and enter your text. You can also add tags.
You can use AI to automatically suggest highlights from the interview recording.
Click Suggest highlights in the Notes and Highlights tab. The button is located above the Add note or highlight button.
If the transcript is already ready, AI will start suggesting highlights right away. If the transcript is not ready yet, the transcript will be generated first, and the highlight suggestions will be created afterward.
Once the suggestions are ready, they will appear directly in the highlights list. Suggested highlights are visually marked, so you can easily distinguish them from regular highlights.
Each suggested highlight can be reviewed individually. You can either:
You need to accept or discard existing suggested highlights before you can suggest more.
After you accept an AI-suggested highlight, it remains marked as AI-assisted. You can see the AI assistant listed as a collaborator below the highlight, together with an AI icon in the highlight card.

Suggested highlights are marked with a purple glow.
Tags help you organize highlights by topic, behavior, issue, insight, or any other category that is useful for your analysis.
Tags are available for highlights and are shared within the same study. This means you can reuse the same tags across highlights from different participants in one study.
When AI suggests highlights, tags are added automatically. The suggested highlights may use tags that already exist in your study, or AI may create new ones if needed.
You can also manage tags manually for each highlight.
To add tags to a highlight:
The selected tag will be added to the highlight.

Choose an existing tag from list of tags.
You can create a new tag directly while managing highlight tags.
To create a new tag:
The new tag is created and added to the current highlight automatically. A random color is assigned to the tag.
You can also click Add tag when the search field is empty. This opens the tag editor, where you can enter the tag name and choose its color before creating it.

Type a new tag text into the Search or create tag field and press Enter or click Add tag.
To edit a tag, hover over it and click the edit icon.
In the tag editor, you can:
When you edit a tag, the change is applied everywhere the tag is used in the study.

When creating a tag, you can customize text and color.

You can choose any color, as long as it provides enough contrast to keep the tags visible.
You can remove a tag from a highlight in two ways:
If an AI generated tag is no longer used by any highlight in the study, it is deleted automatic.

To remove a tag simply hover over it and click the X button.
Access the participant details at any time. The details include:
You can also edit the summary of the participant’s interview.
You can use AI to automatically suggest a summary of the participant’s interview.
Click Suggest summary to generate it. Once the AI summary is available, you can:
You can edit, rewrite, or fix the summary manually at any time – even after accepting an AI-generated one.

The general information about the participants and their time slot. Suggest, edit, and review your summary here as well.

You can copy, regenerate, delete, or accept the AI-suggested summary.
The recording outline is automatically generated after the transcript is finished.
It provides a quick overview of the recording — highlighting its main topics and moments.
If you make changes to the transcript, you can choose to regenerate the outline to reflect the updates, or keep the existing one if you prefer not to overwrite it.

Read through your recording outline anytime.
The Transcript tab provides powerful tools for editing and managing captions to ensure an accurate and clear representation of the recorded interview. This feature allows for seamless editing, addition, and deletion of captions to better match the video dialogue.
Key features of the Transcript tab include:

You can open the editor by clicking on the Transcript tab in the top part.

You can add a new transcript by hovering and clicking between the captions or between different speakers.

By hovering on the specific caption, you can reveal multiple options. You can edit the caption, create a note from it, copy it to the clipboard, or delete it.

When you add or edit the caption, the caption editor is open, where you can edit the speaker, start and end time, and caption text.
Skip to any moment in the recording and set it as a thumbnail to better navigate between participants.
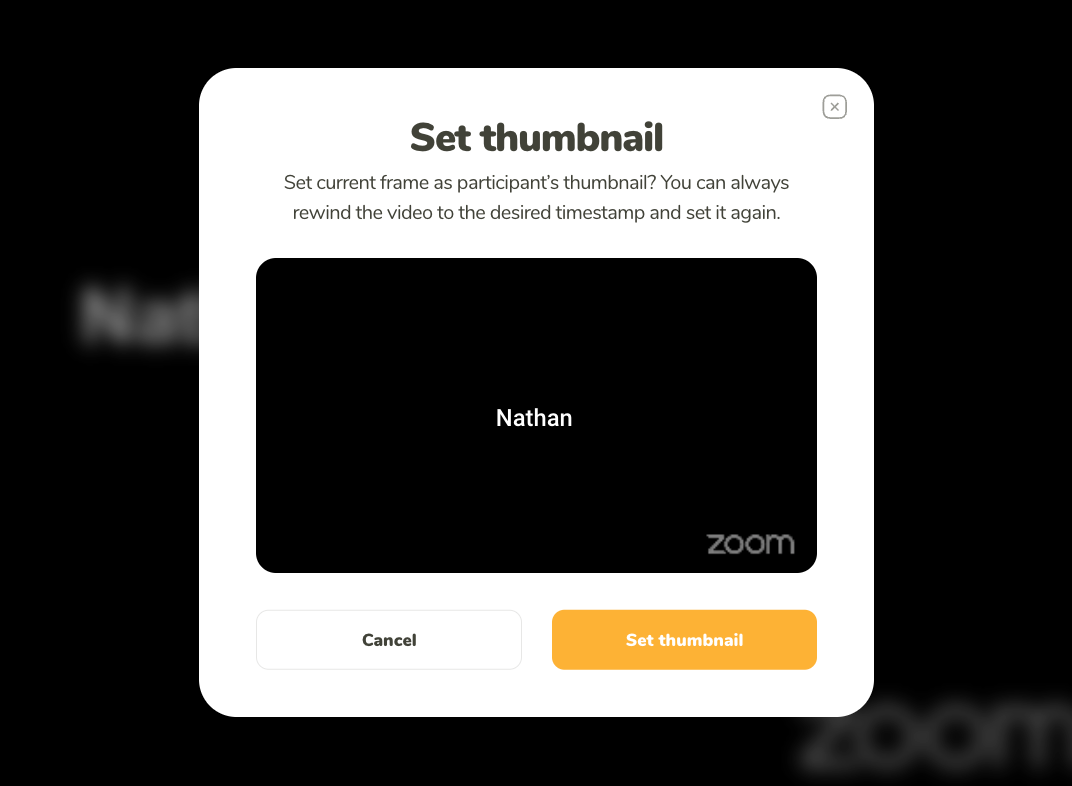
Choosing a representative thumbnail can significantly ease the orientation in recordings.
All recordings can be exported in mp4 format. Simply click the export button below the player.