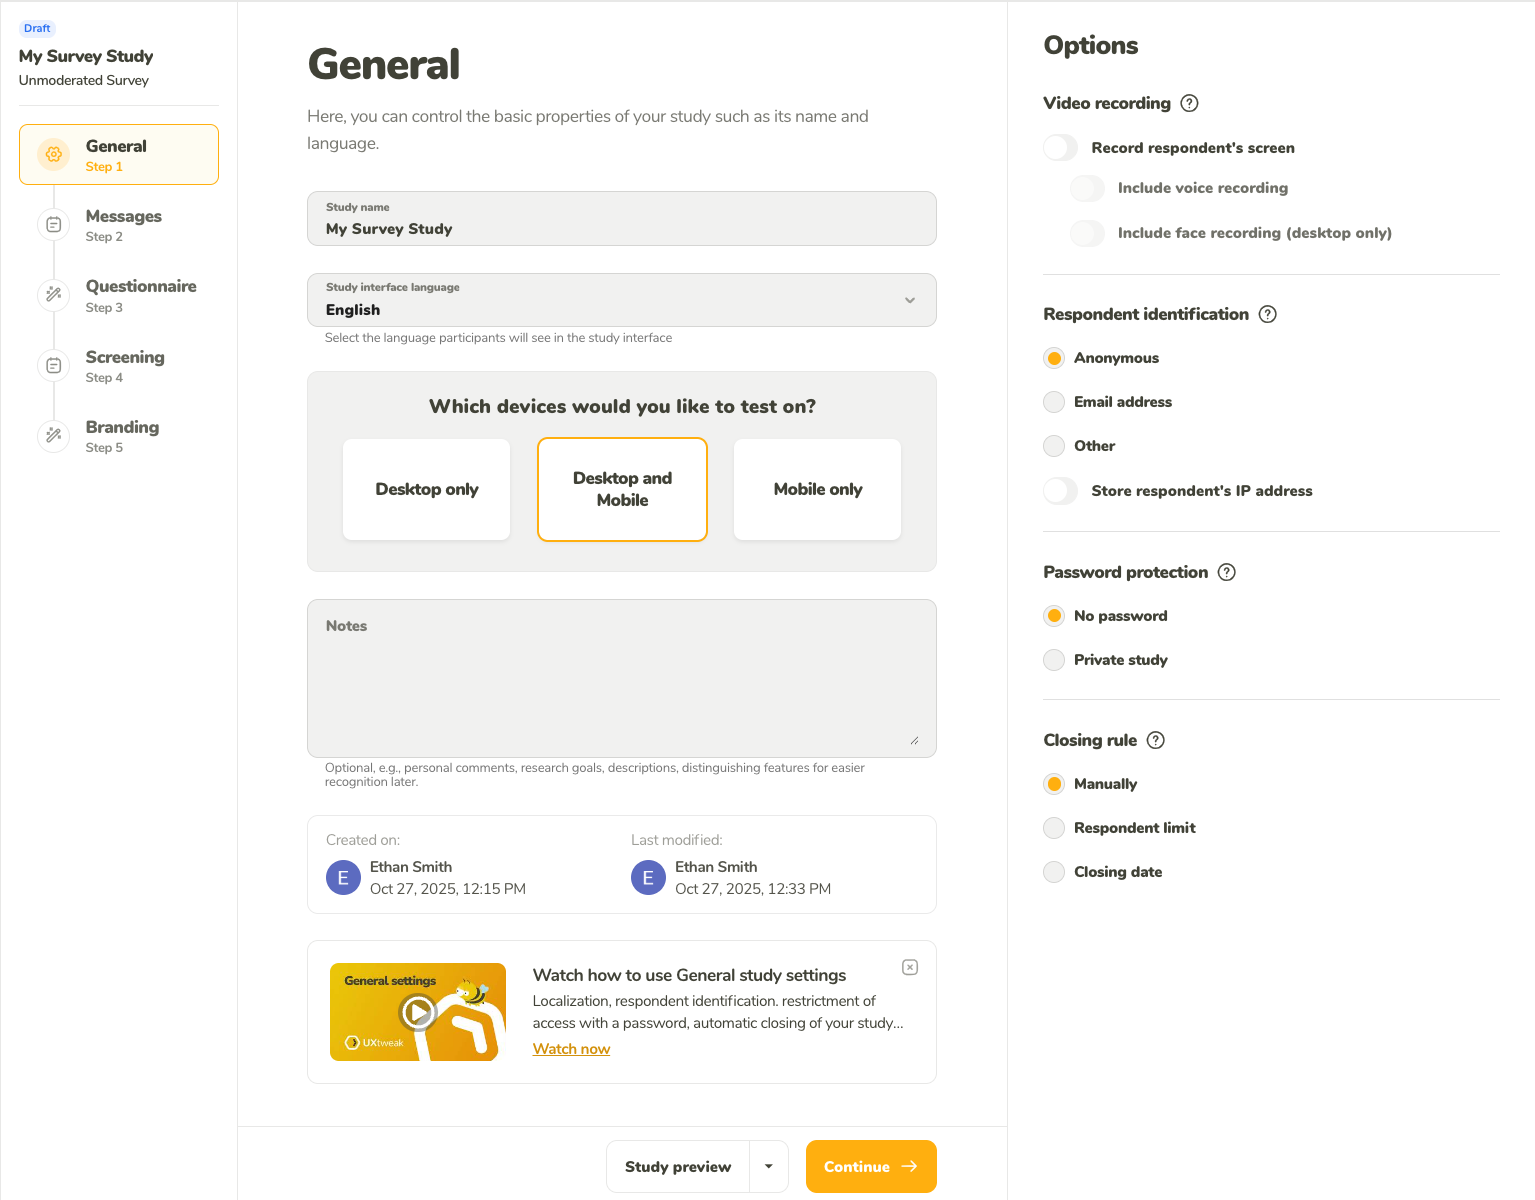
This section covers how to use the General step to:
Name your study
Set the language of your study
Select a device to be tested on
Choose whether and how the respondents have to identify themselves
Protect your study with a password
Set the ending conditions for the study
Watch how to use General study settings
Localization, respondent identification. restriction of access with a password, automatic closing of your study, and more…
General settings
Name your study and set the study language.
Name your study
Respondents don’t see the study name displayed anywhere
Use a name that helps you identify the study on the dashboard
Set the language of your study
Language determines the language of the labels and headings in the study
Select a device to be tested on
You can restrict whether the study can be completed only on desktop, on mobile, or both
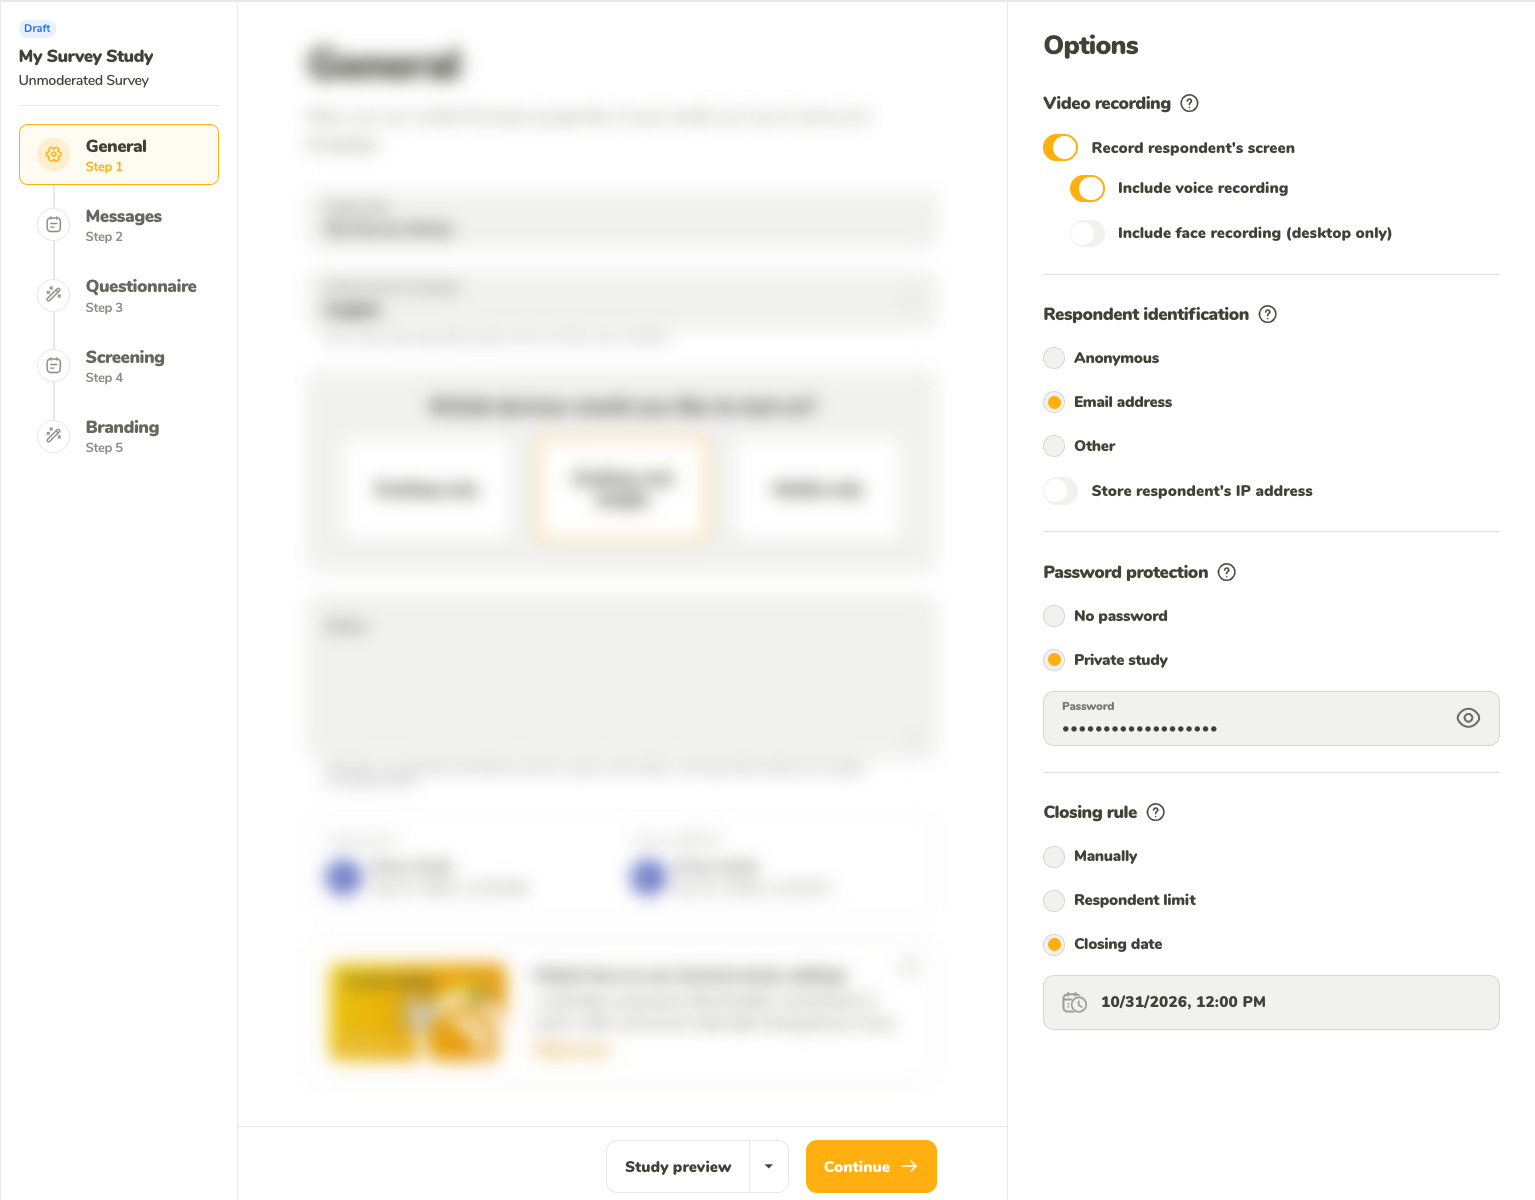
Choose whether and how the respondents have to identify themselves
Select one of the following respondent identification options:
Anonymous – The respondents don’t have to identify themselves (default option)
Email address – Demand that they provide their email before they begin
Other – Ask for another identifier of your choice (e.g., name, screen name, internal company ID)
Unless the study is left anonymous, respondents won’t be allowed to go forward until they identify themselves.
The respondents’ identification will be displayed next to their study results.
If you selected Other identifiers, by enabling Allow duplicate identifiers, you can allow multiple respondents to use the same identifier (e.g., to identify members from the same group).
By default, your study won’t store the IP addresses of respondents. You can enable them with the Store respondent IP address option.
Protect your study with a password
No password – the study is open to anybody who has a link to it
Private study – ask would-be respondents to enter a password first.
The password has to be between 1 and 250 characters long, with no additional demands on the type of characters.
Don’t forget to share the password with the intended respondents!
Set the ending conditions for the study
By finishing a study, you make sure that it stops collecting data from more respondents. You can finish a study both manually and automatically:
Manually – End the study anytime you want, without constraints
Respondent limit – Automatically finish the study once it’s been conducted with enough respondents.
Closing date – Automatically finish a study once a deadline has been reached.
Even when you set a study to finish automatically, you can always finish it manually when you want to by clicking the Finish button.
If a deadline is reached while some respondents are still working on completing the study, these respondents will be allowed to finish up.
CAN I REOPEN A FINISHED STUDY?
Once a study has been finished, there is no way to reopen it. Therefore, be careful about setting your finishing conditions or finishing the study manually so that you’re absolutely sure you don’t want to collect any more data in the same study afterward.
If you want to repeat the same study as the one you did in the past, you can opt to clone the study project. You can either tweak it or leave it as is before you launch the project as a new study. (Clone can be done either from the dashboard or from the dropdown in the upper right corner).
Other general options
Decide whether and how you want to identify the respondents. Whether you want to protect access to the study with a password. Set rules for ending the study automatically.
We need your consent to use cookies
on our website to provide you with the highest level of service.
You can change the settings by clicking the "Settings" button.
These cookies are necessary to ensure the operation and basic functions of the UXtweak website.
They store information about your UXtweak session and help protect your privacy.
Analytics cookies
These cookies are used to analyze traffic on our website, so that we can better understand our users
and improve the site's content, usability and functionality.