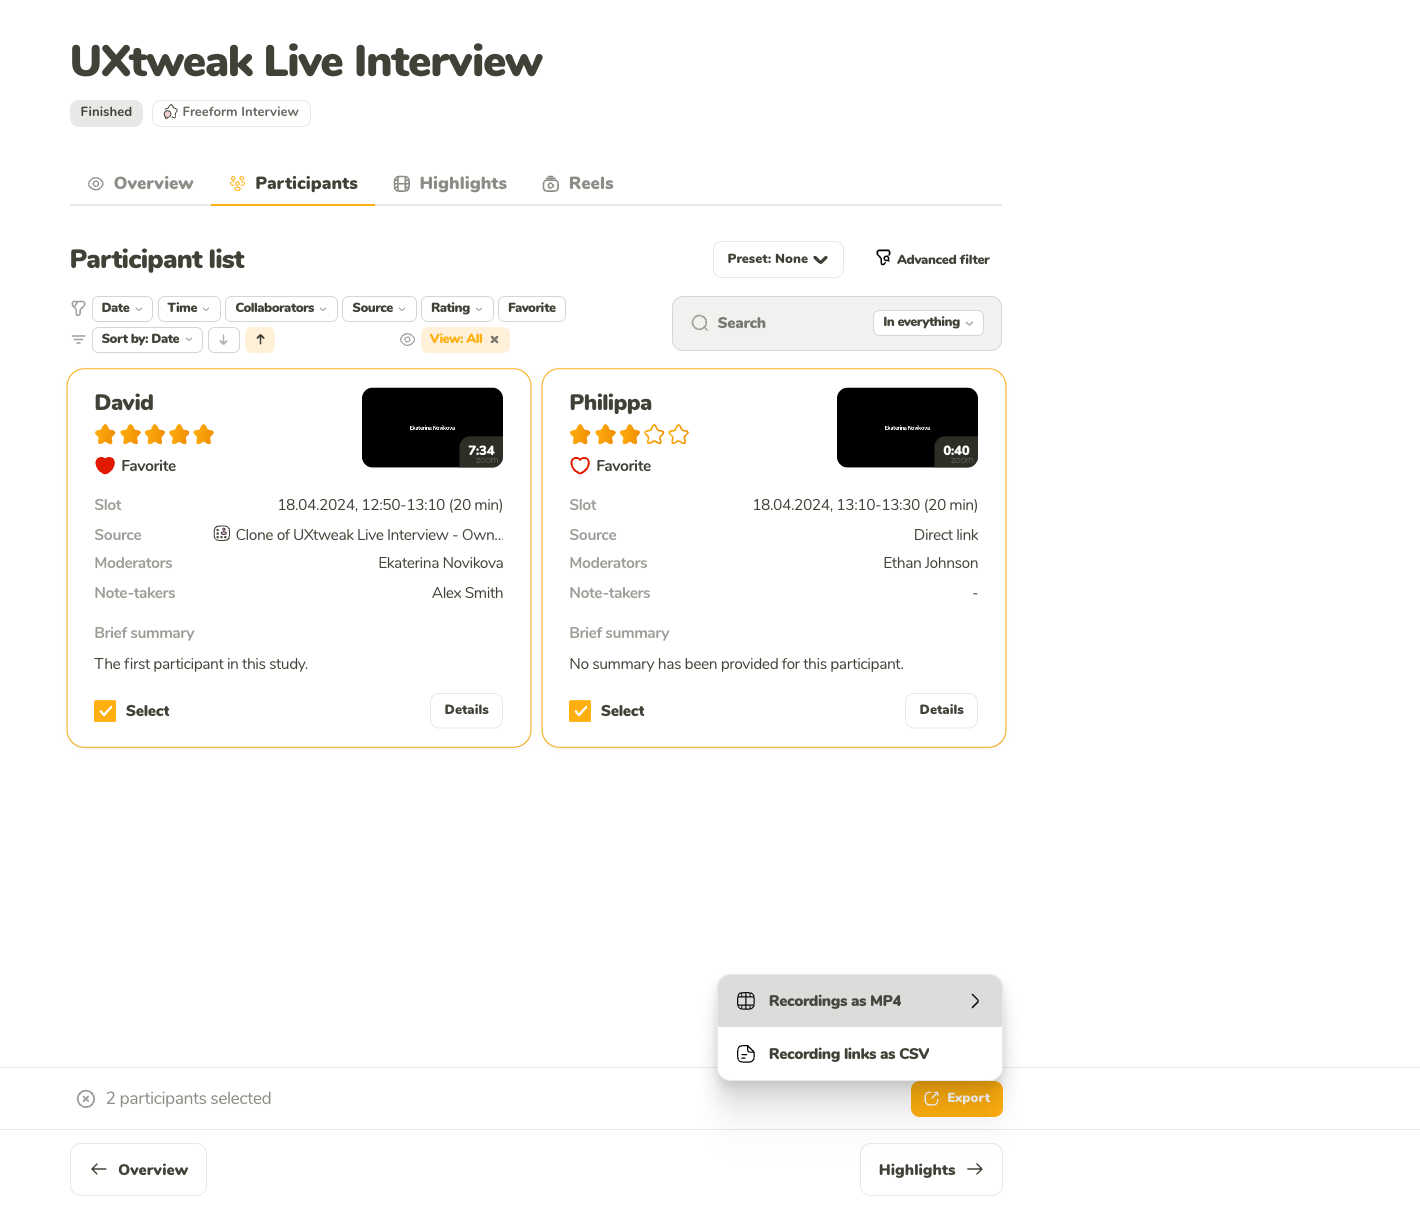
Select what you want to export
Select what you want to export<br>First, select the items you’d like to export. Then click Export and choose a format that works for you.
Learn how to set up and use UXtweak
Explore possibilities with demo studies and results

Export and analyze insights faster. Sync your favorite tools with UXtweak
Resources for mastering research, design and product
Definitions of UX terms and phrases
UX insights and tips to sharpen your skills

Studies published in peer‑reviewed journals and industry publications.
Watch our quick, educational UX videos
Listen to top researchers share their stories, wins, lessons
Microsoft OneDrive is a cloud storage platform that supports file management, including storage, synchronization, sharing, and security. It provides tools for organizing files, accessing them across devices, and collaborating within an integrated interface.
Our Microsoft OneDrive integration makes exporting your videos, analyses, and other files simple. Start by connecting your account with a one-time setup to enable the integration. When you’re ready to export, just select your files and where you’d like them saved. After selecting this, you’ll be prompted to authorize access if it’s your first export in the session. This quick authorization step follows Microsoft’s standard security process to keep your data safe. Once authorized, you can export as many files as you like during that session without reauthorizing.
Select what you want to export<br>First, select the items you’d like to export. Then click Export and choose a format that works for you.

After choosing a format, pick where you’d like to export the items.
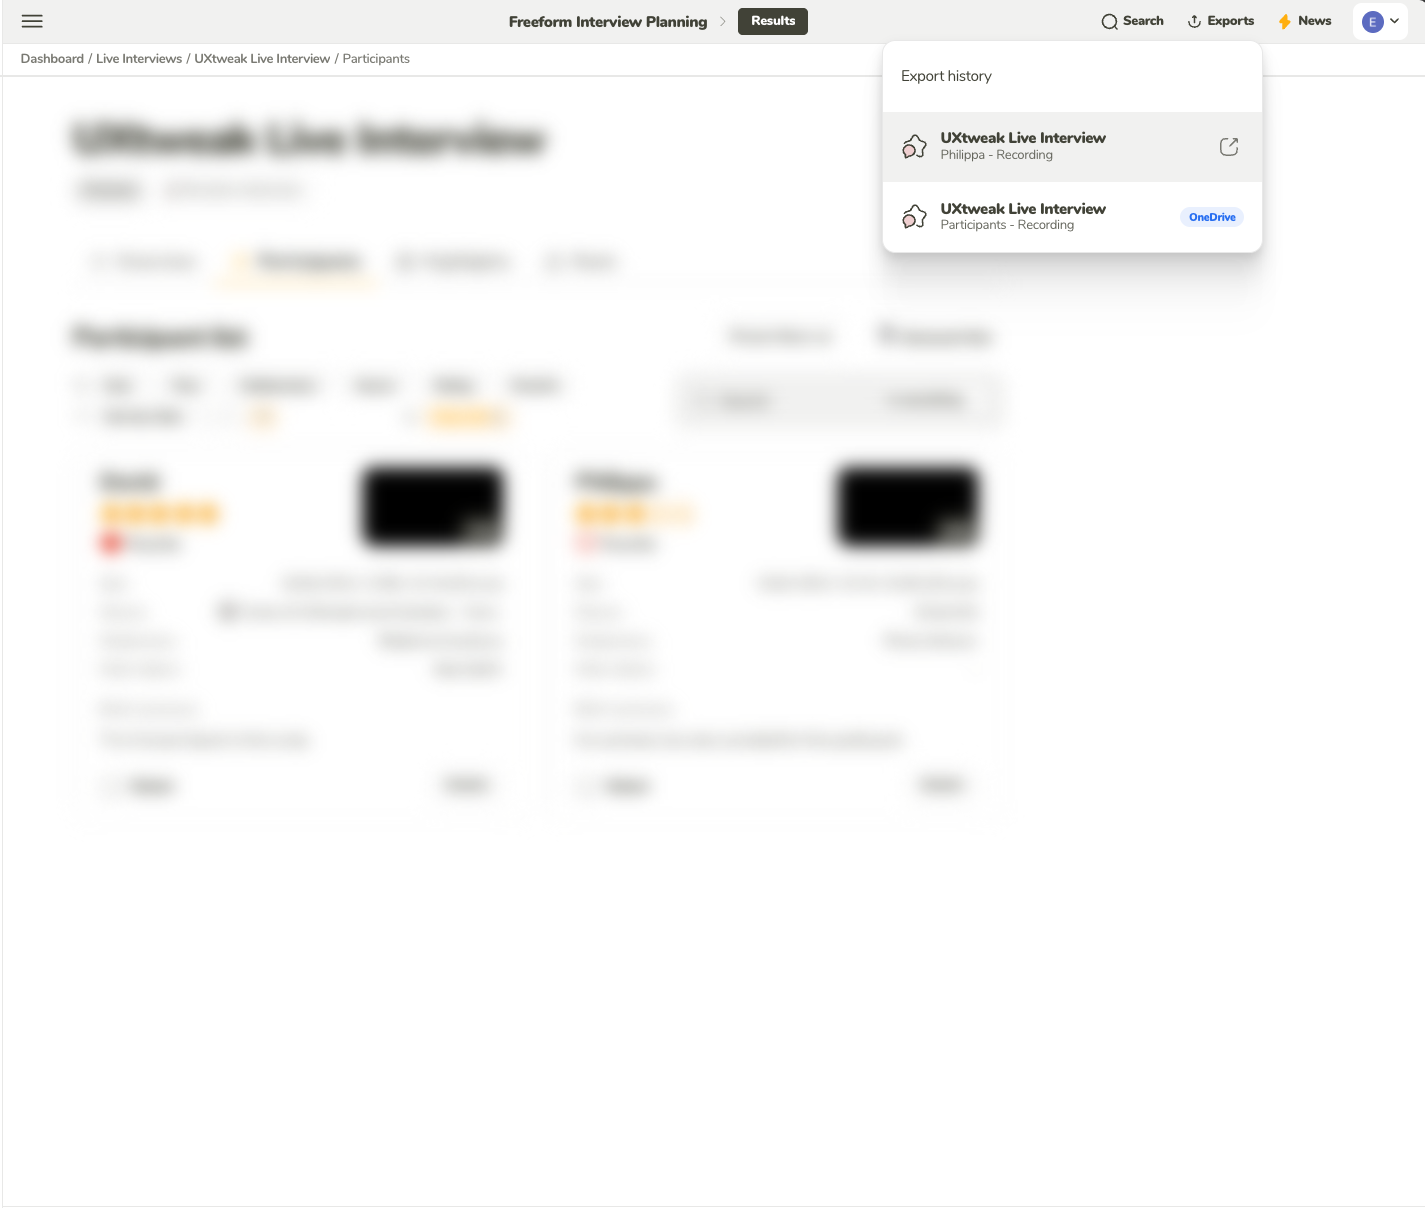
You can find your exported items in the Exports dropdown. Click an item to open its destination, or download it if that’s the option you chose.
To enable the Microsoft OneDrive integration, go to the Integrations page from the profile menu. On this page, simply toggle the Microsoft OneDrive integration on and authorize the account you want to use. Once authorized, your account will be successfully linked to UXtweak, allowing you to easily start exporting your assets.
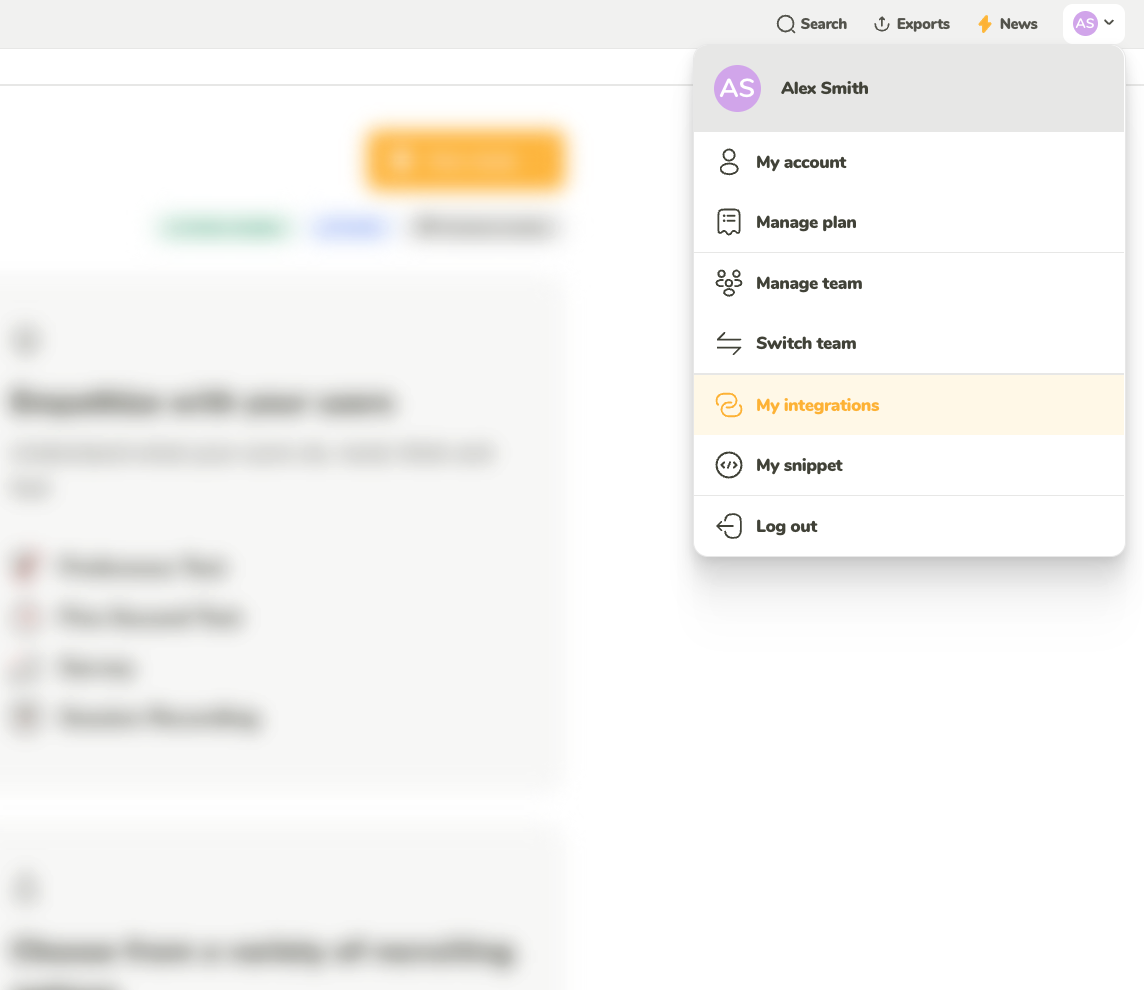
In the profile dropdown menu, select ‘My integrations.’

On the My integrations page, you can see all the possible integrations you can manage. In this case, select Microsoft OneDrive.

You will be redirected to the standard Microsoft authorization, where you can select which account you want to authorize or log in from scratch.
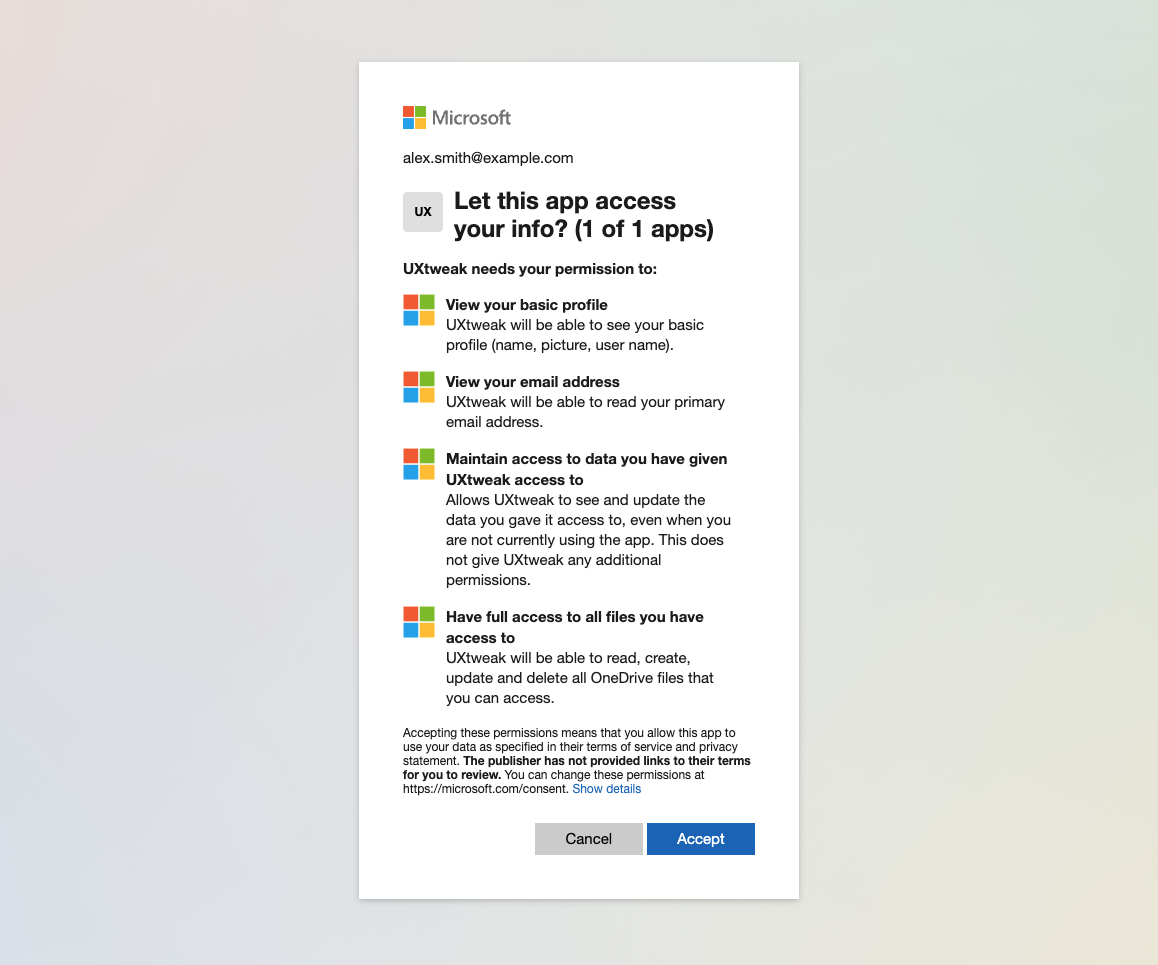
Finally, you will be asked to grant all the necessary permissions for us to upload.
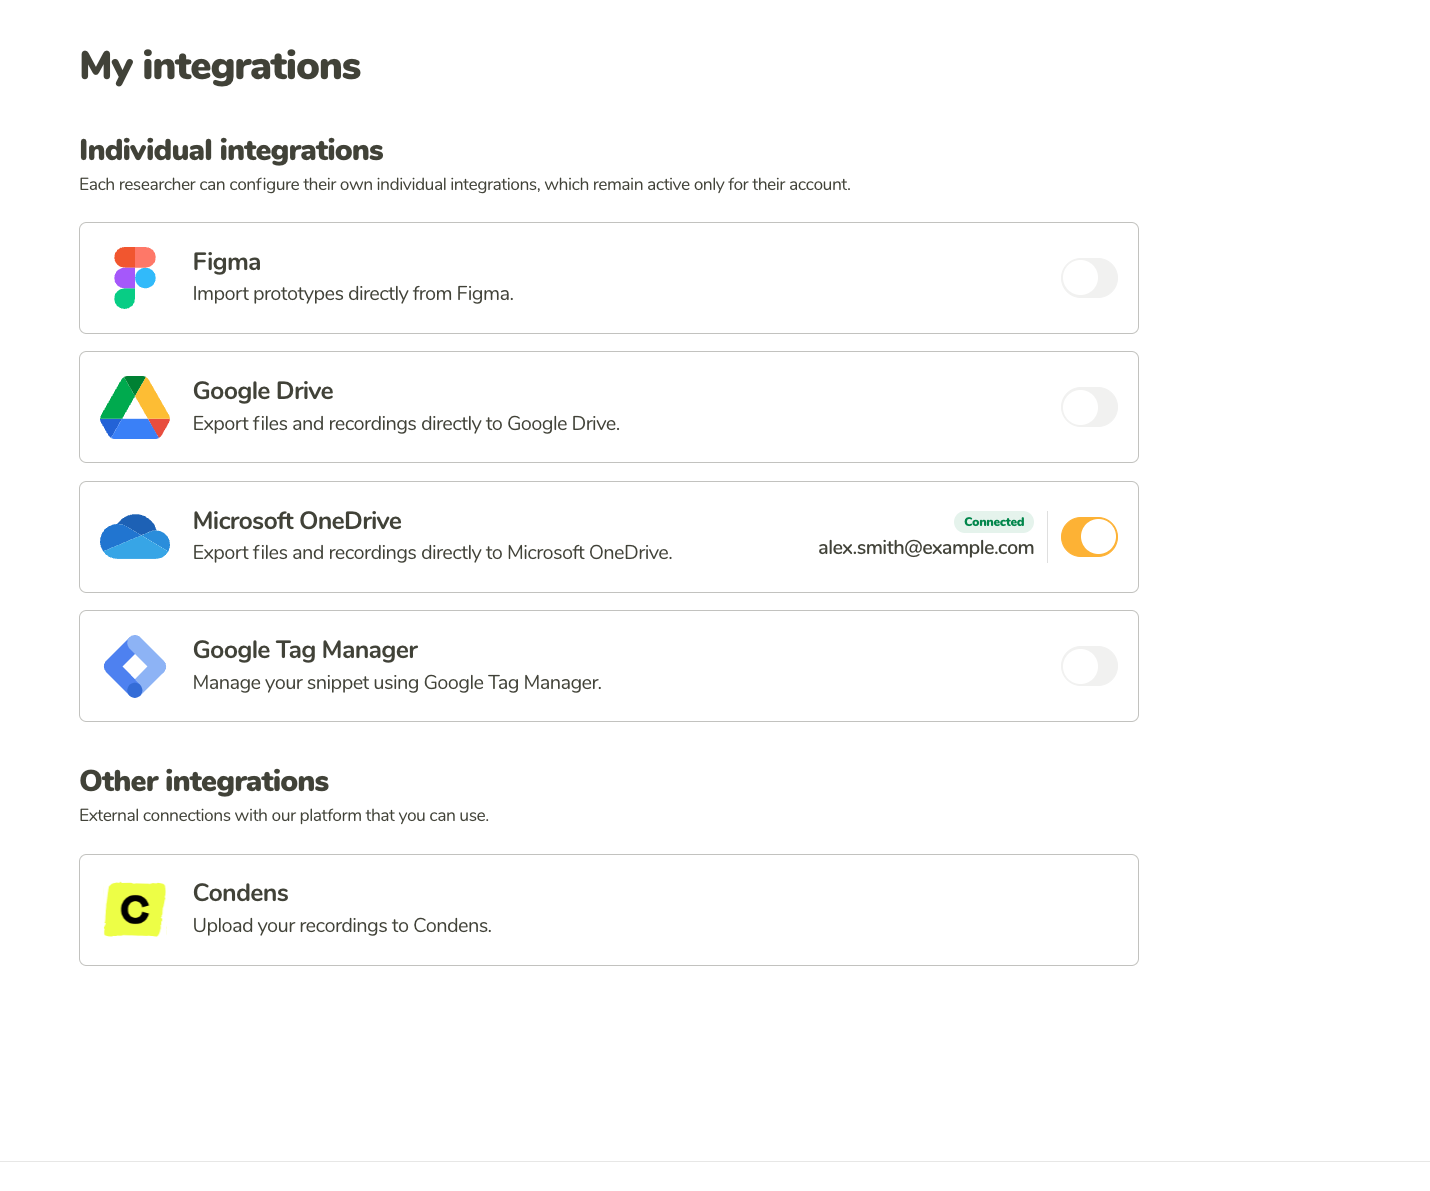
When the integration is enabled, the toggle will be switched on, along with the e-mail of your connected account and the label ‘Connected.’
You can also enable the integration directly when exporting for the first time. If you’re not logged in and try to export something, you’ll be prompted to authorize your Google account. Once authorized, it will automatically be added to your integrations.
When you connect your Google account, you’ll be asked to allow access to the following:
We won’t change anything in your content. We will only upload the files you’ve selected for export.