The list of reels
A quick and easy overview of all created reels with its description and other details.
Learn how to set up and use UXtweak
Explore possibilities with demo studies and results

Export and analyze insights faster. Sync your favorite tools with UXtweak
Resources for mastering research, design and product
Definitions of UX terms and phrases
UX insights and tips to sharpen your skills

Studies published in peer‑reviewed journals and industry publications.
Watch our quick, educational UX videos
Listen to top researchers share their stories, wins, lessons
This section covers various parts and functions in the Reels tab, including:
This list provides a quick and easy overview of all the reels created from the highlights. To access the reel, simply click on its thumbnail in the list to play it within the card or click on the Details button and open the Preview tab. The card also contains the Details tab, which contains the reel details.
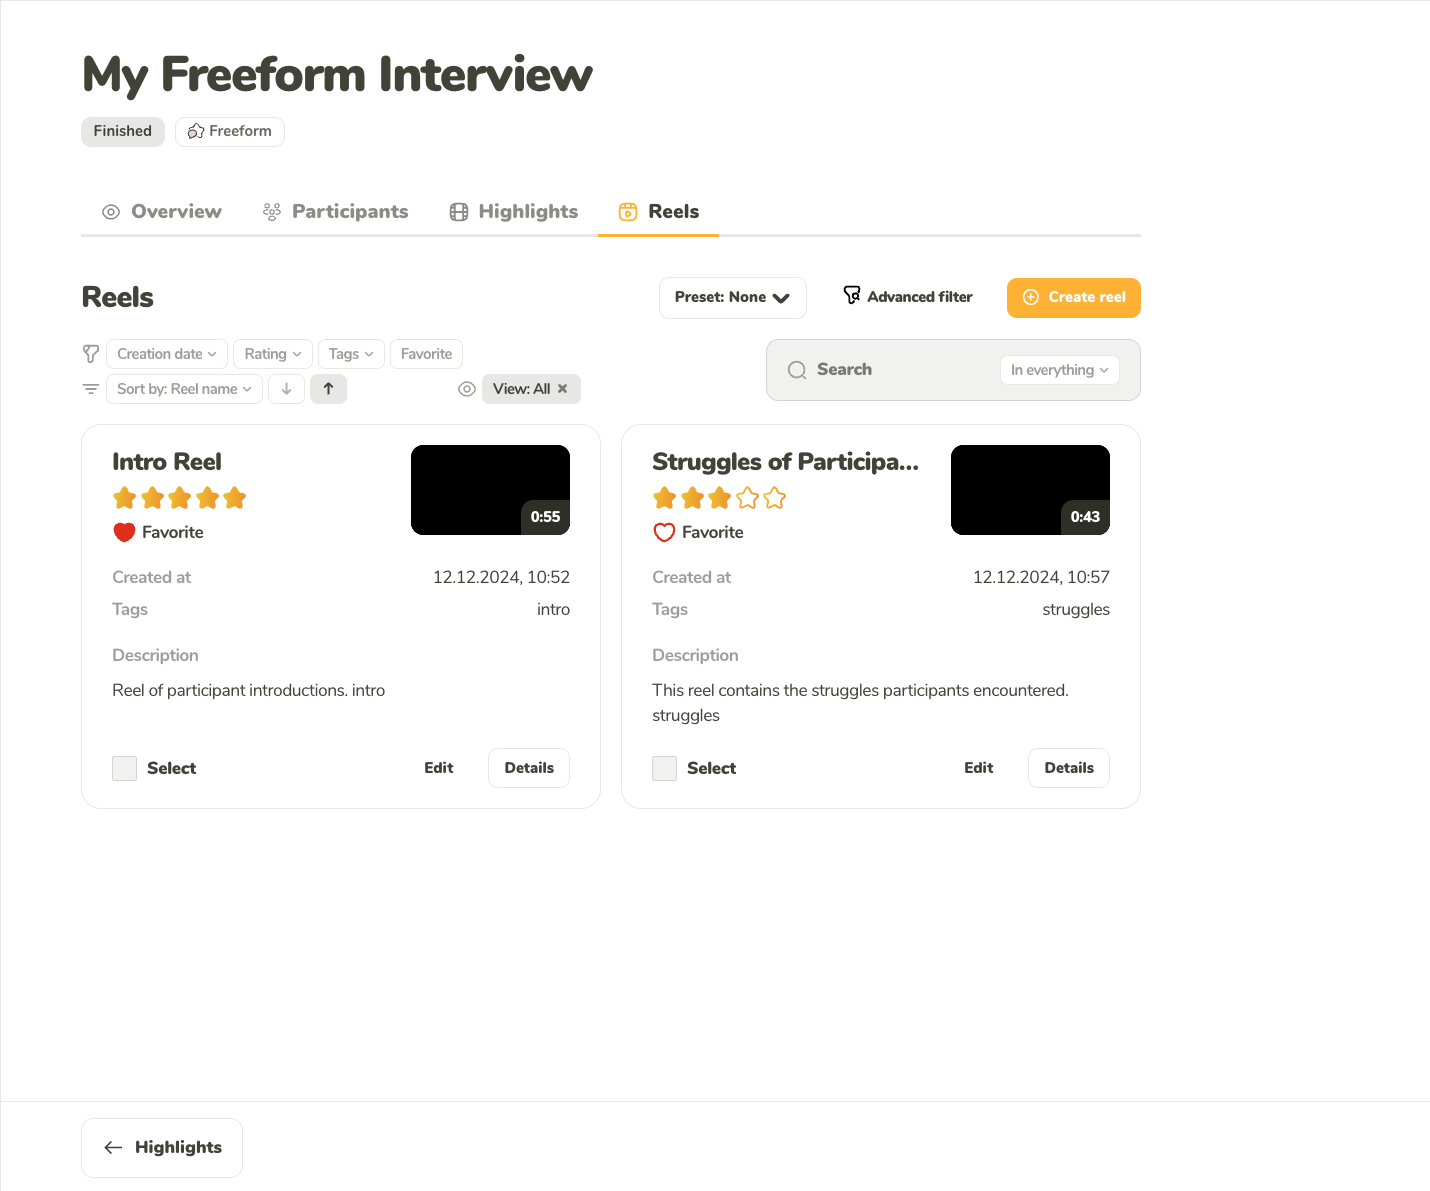
A quick and easy overview of all created reels with its description and other details.
The analysis of multiple reels can be eased with access to robust filtering, sorting, and search options.
You can filter the reels by any combination of the following:
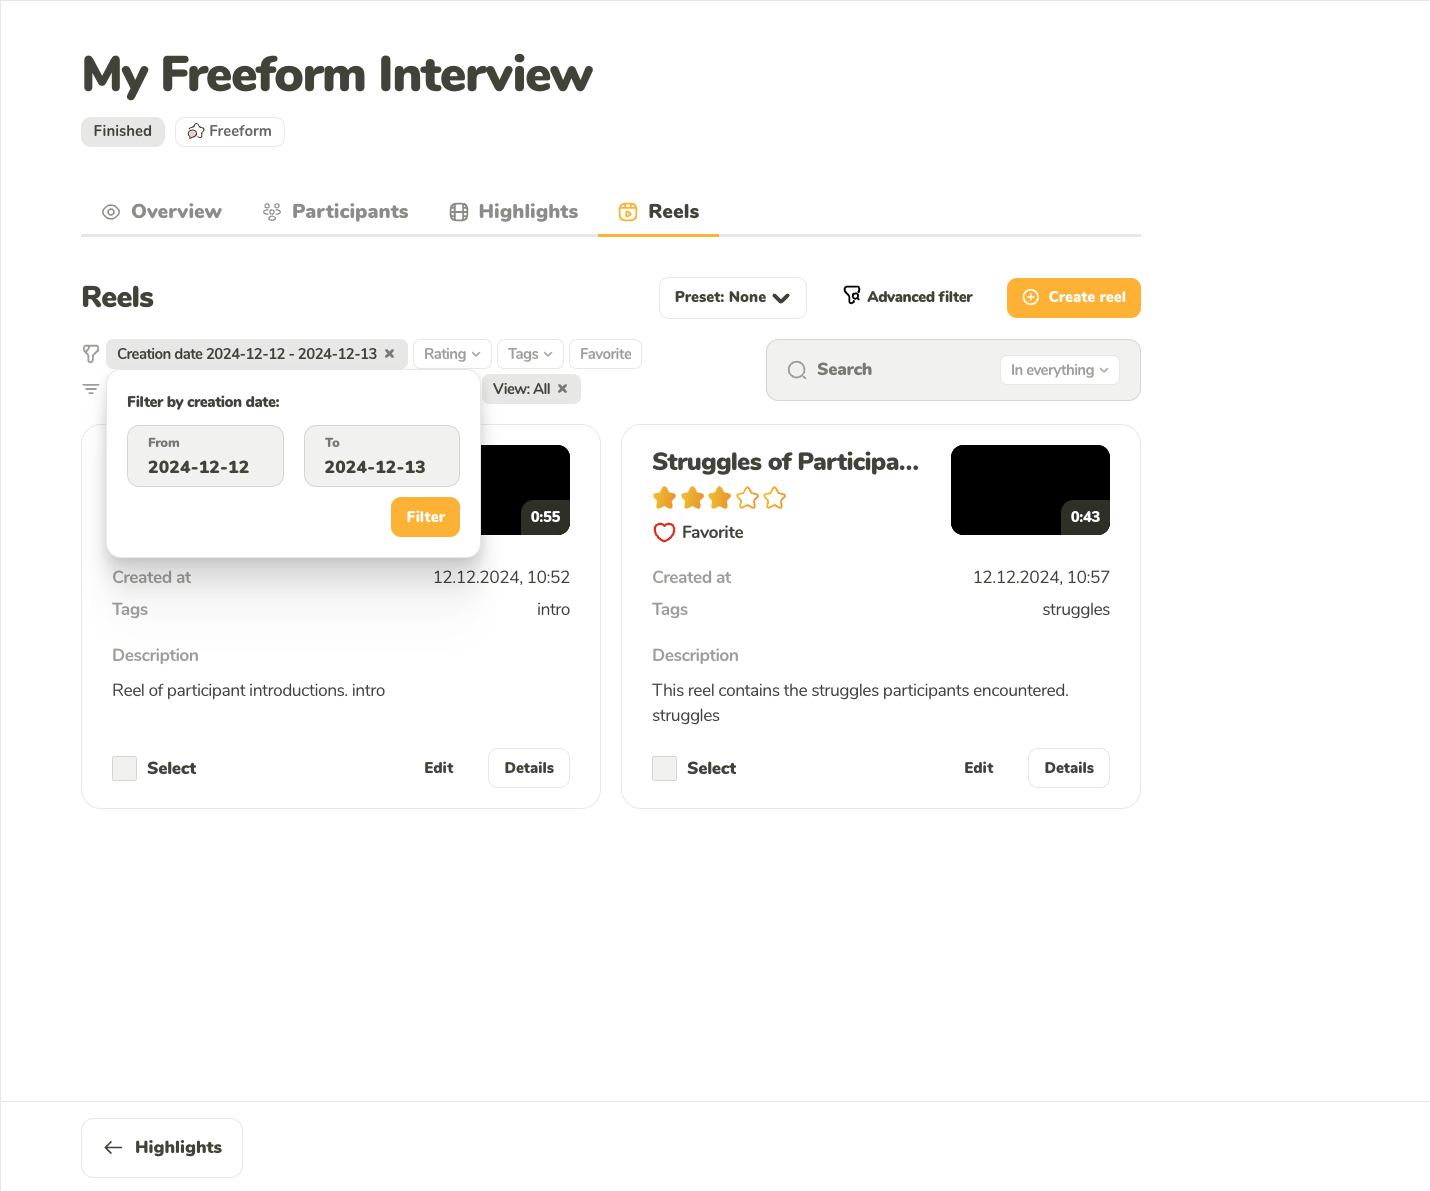
Filter the reels by the date when they were created.
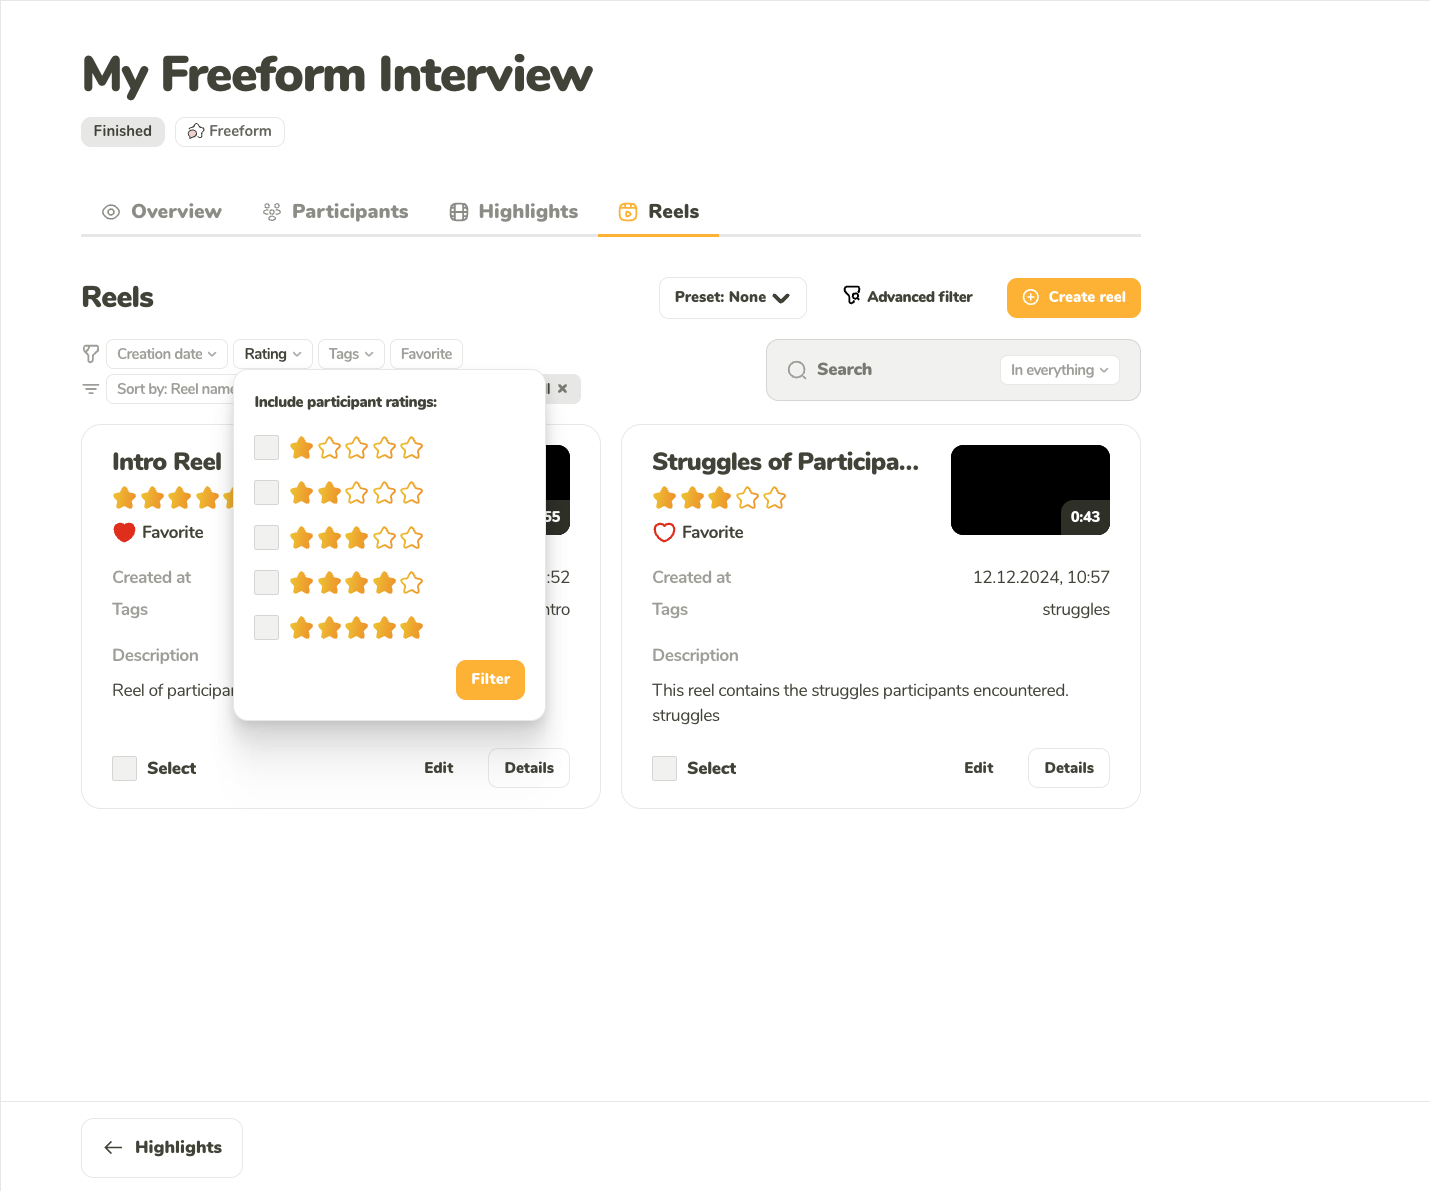
Filter the reels by the custom rating you gave them.
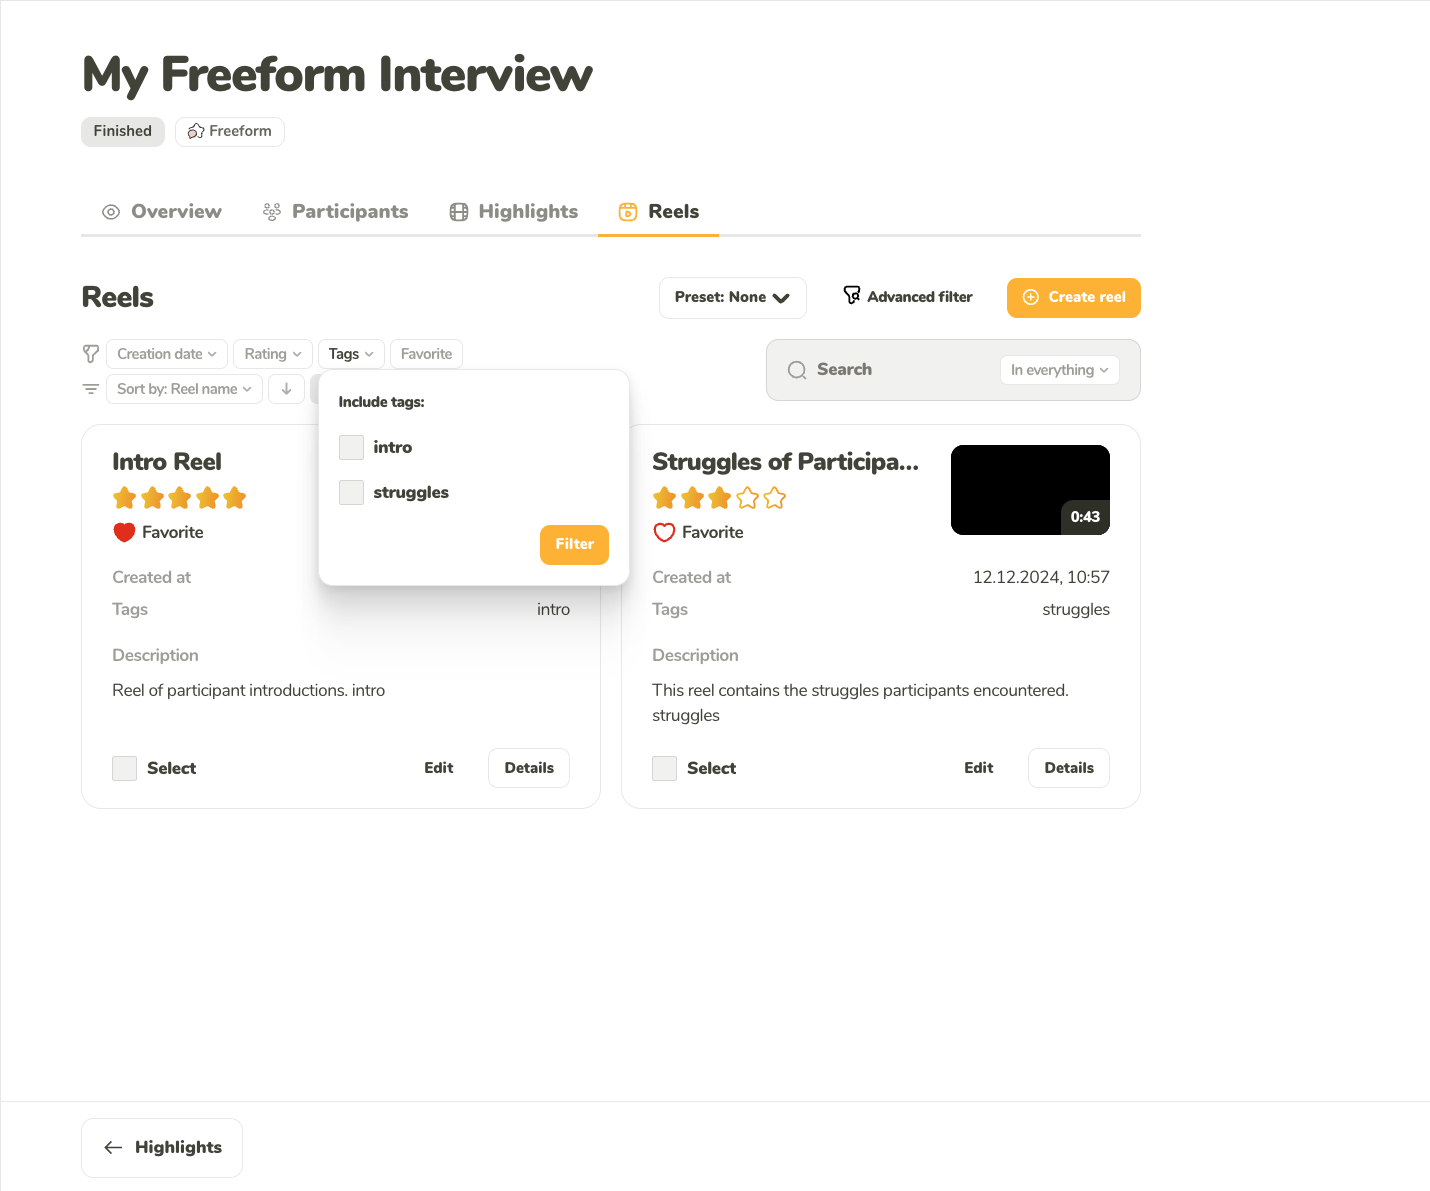
Filter the reels by the tags you wrote in the reel description.
You can sort the participants ascending and descending by:
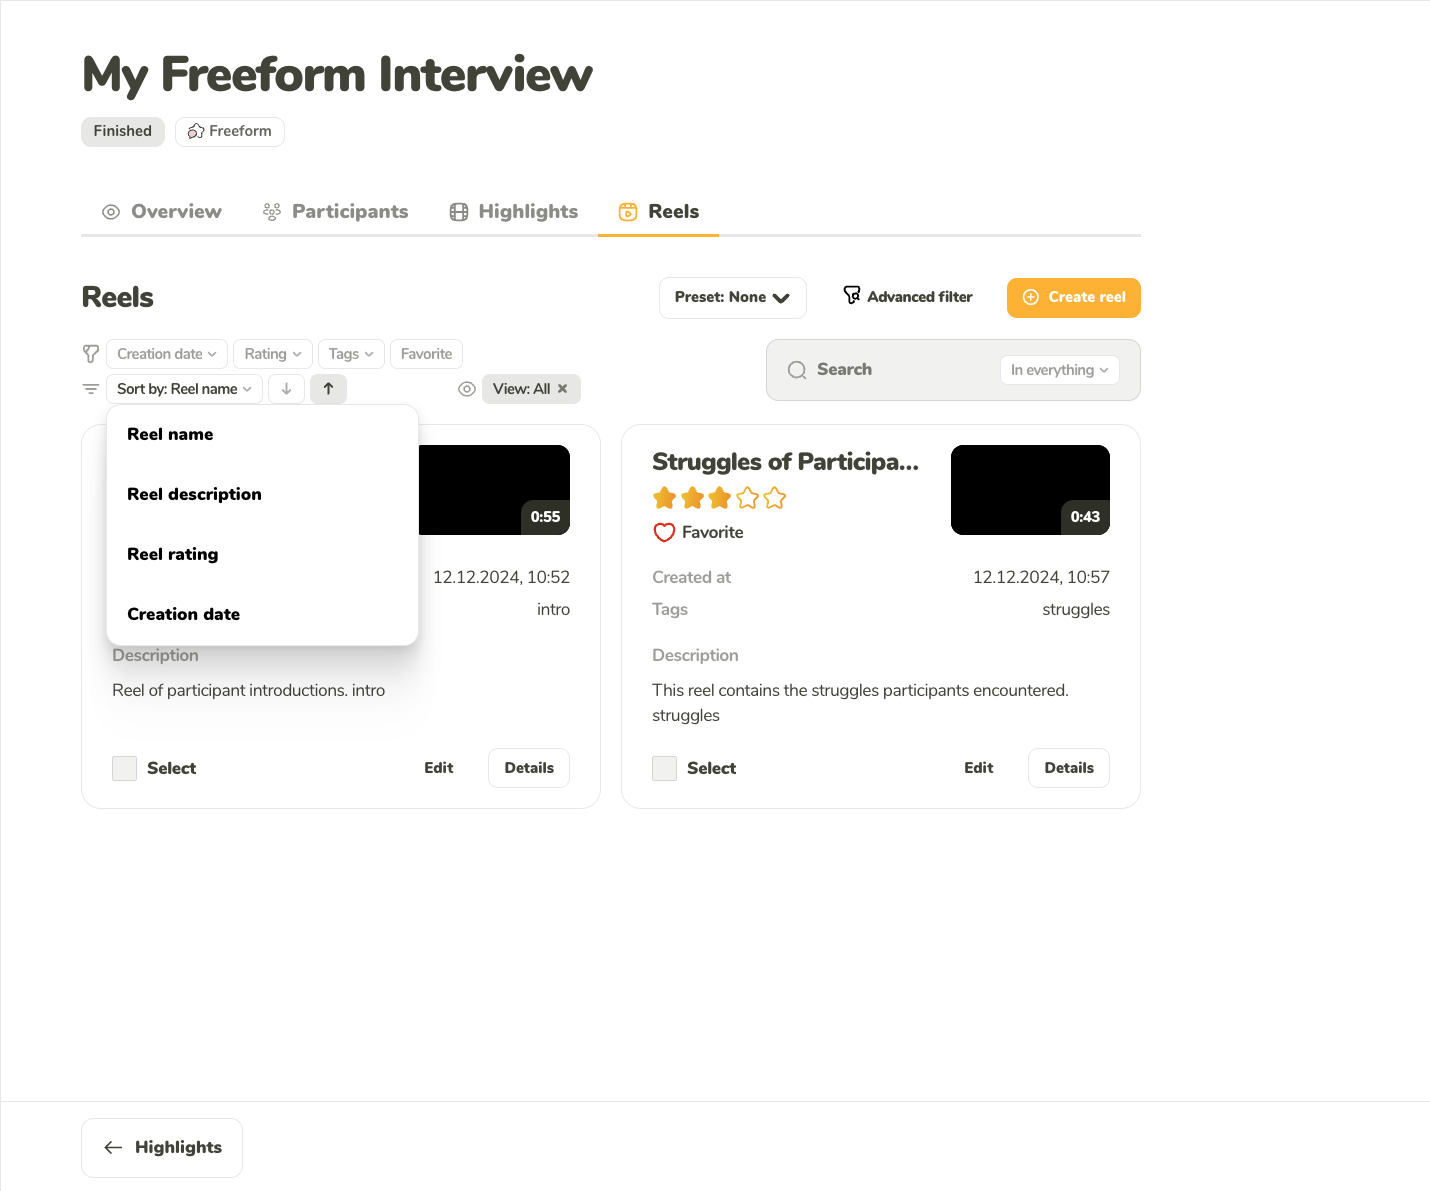
You can sort the interviews by date, rating, and the interview length
Use the full-text search to comb through:
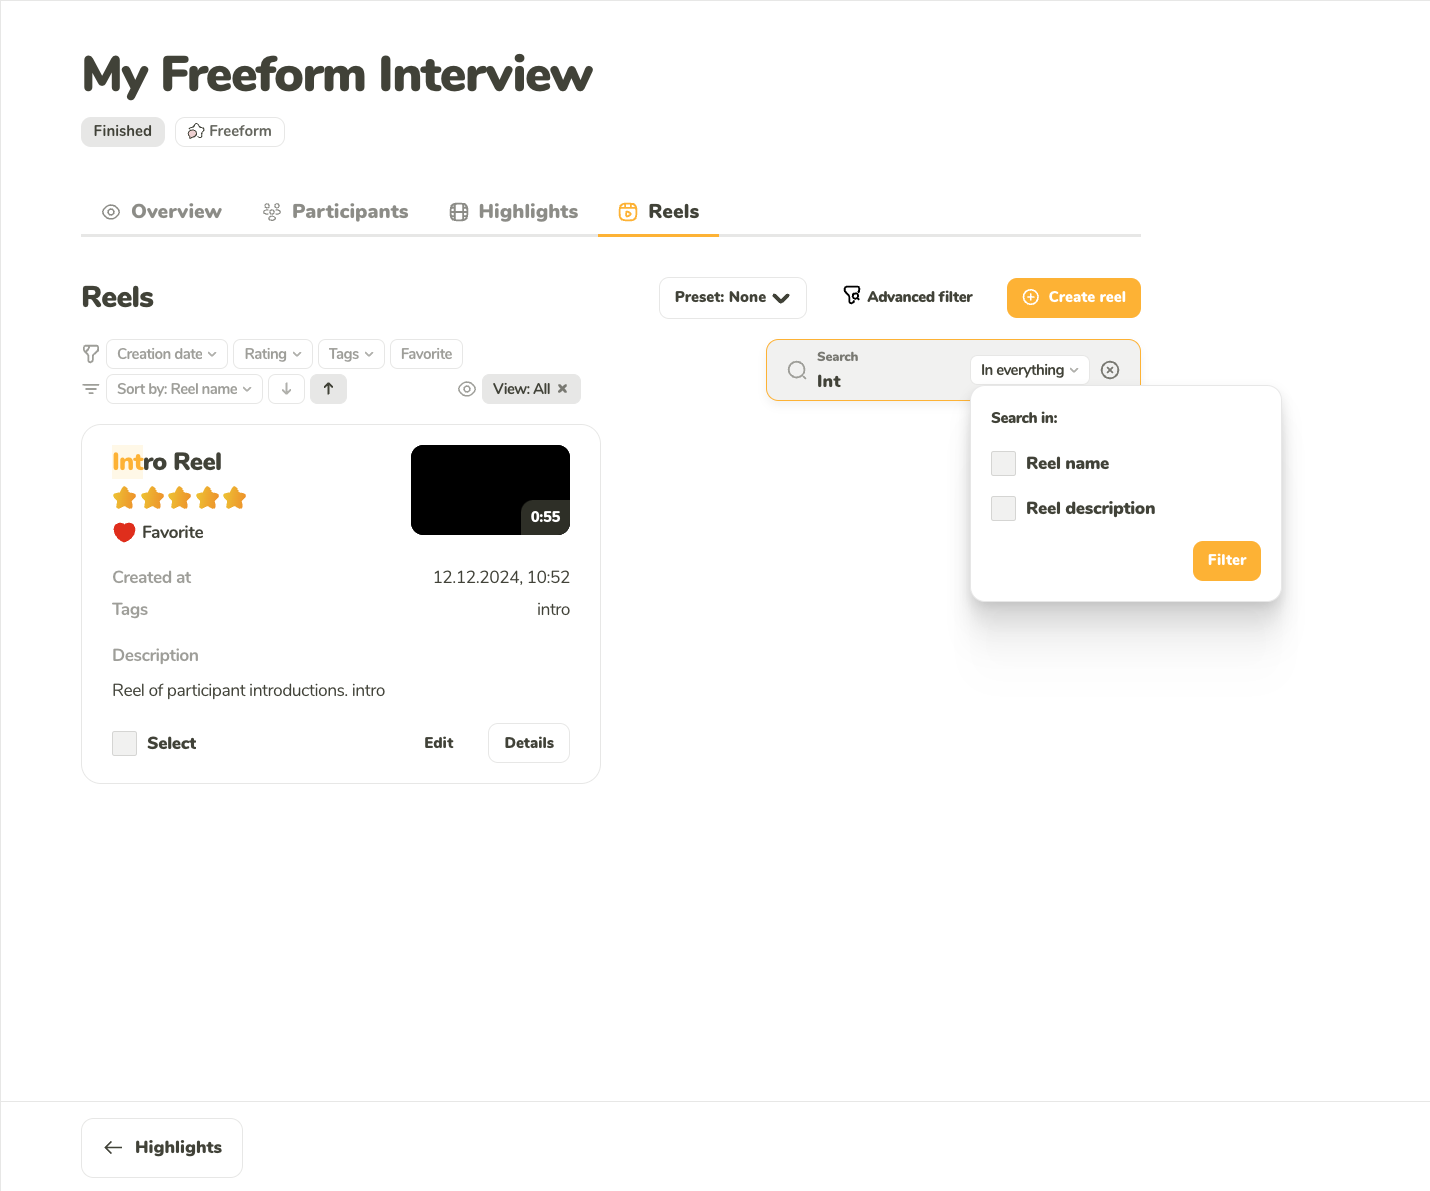
Use full-text search to easily find the insight you are looking for.
You can easily manage which details to show or hide in the reel list. Simply toggle to view or hide the following information:
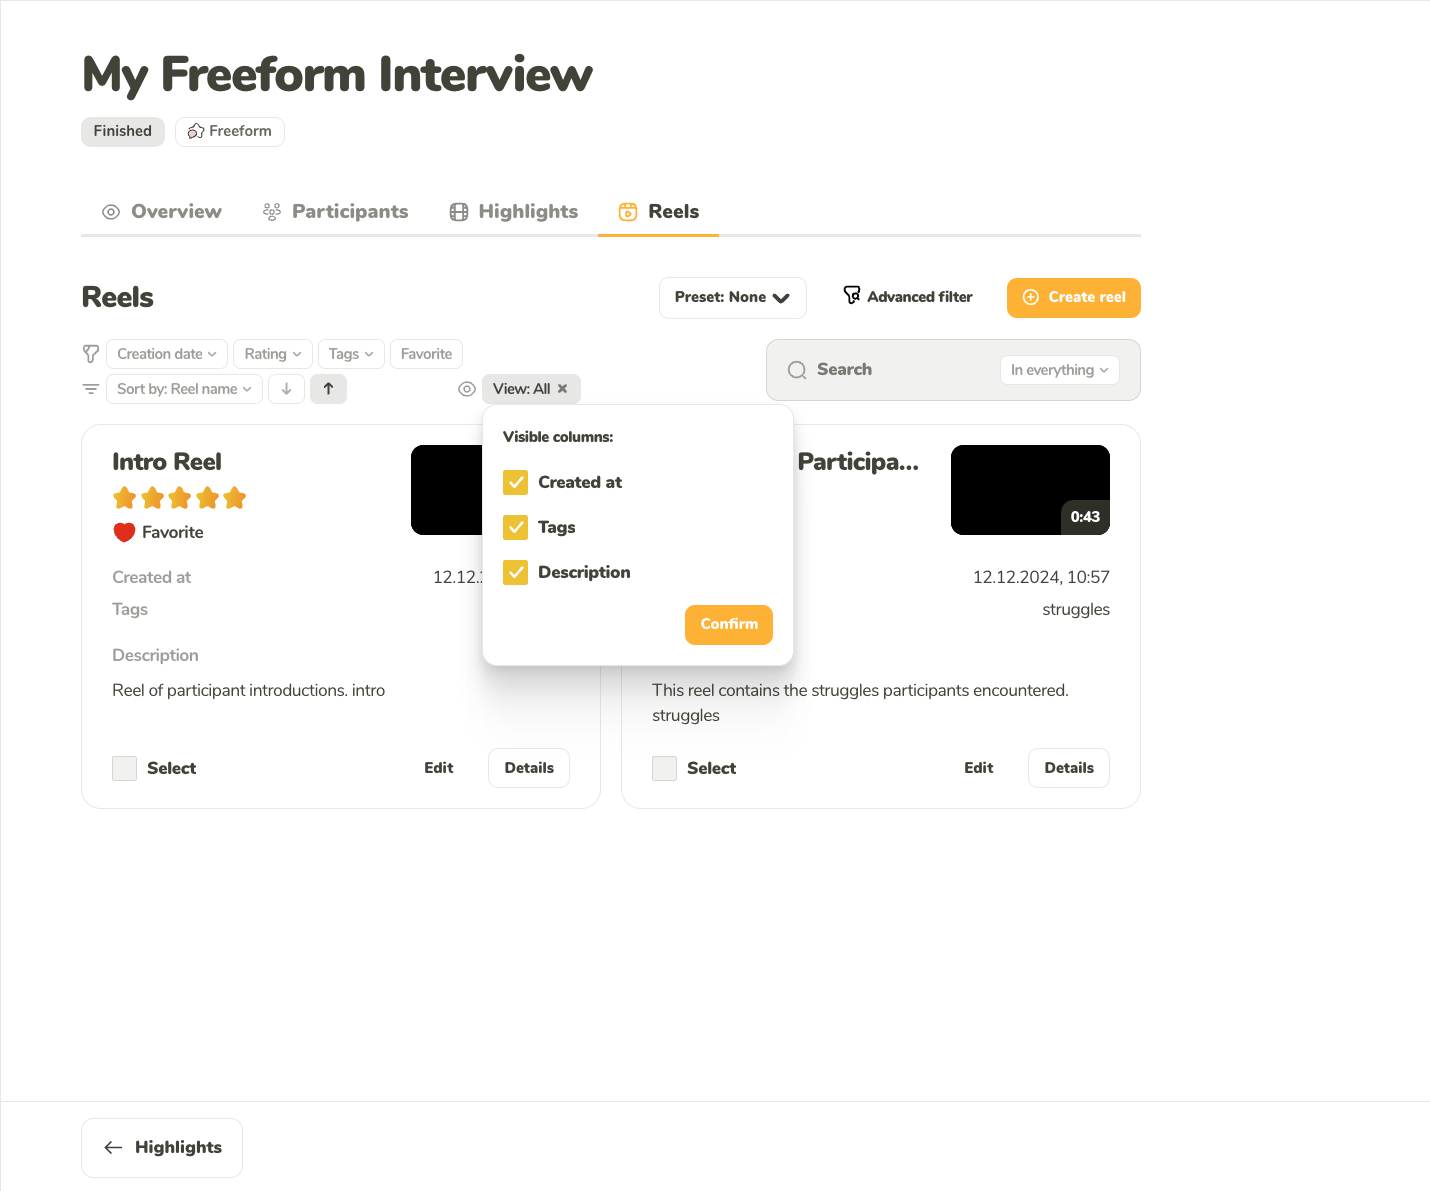
Choose what information you want to have displayed in the list of the reels.
The initial section of the reel editor is dedicated to setting up the name and description of your reel. These details are crucial as they help you easily identify the reel once it has been created.
Additionally, you have the option to include tags in the description. Tags allow you to categorize your reels, making it easier to filter and locate specific content in the future, as explained in earlier sections. You can also add mentions to highlight relevant individuals or teams.
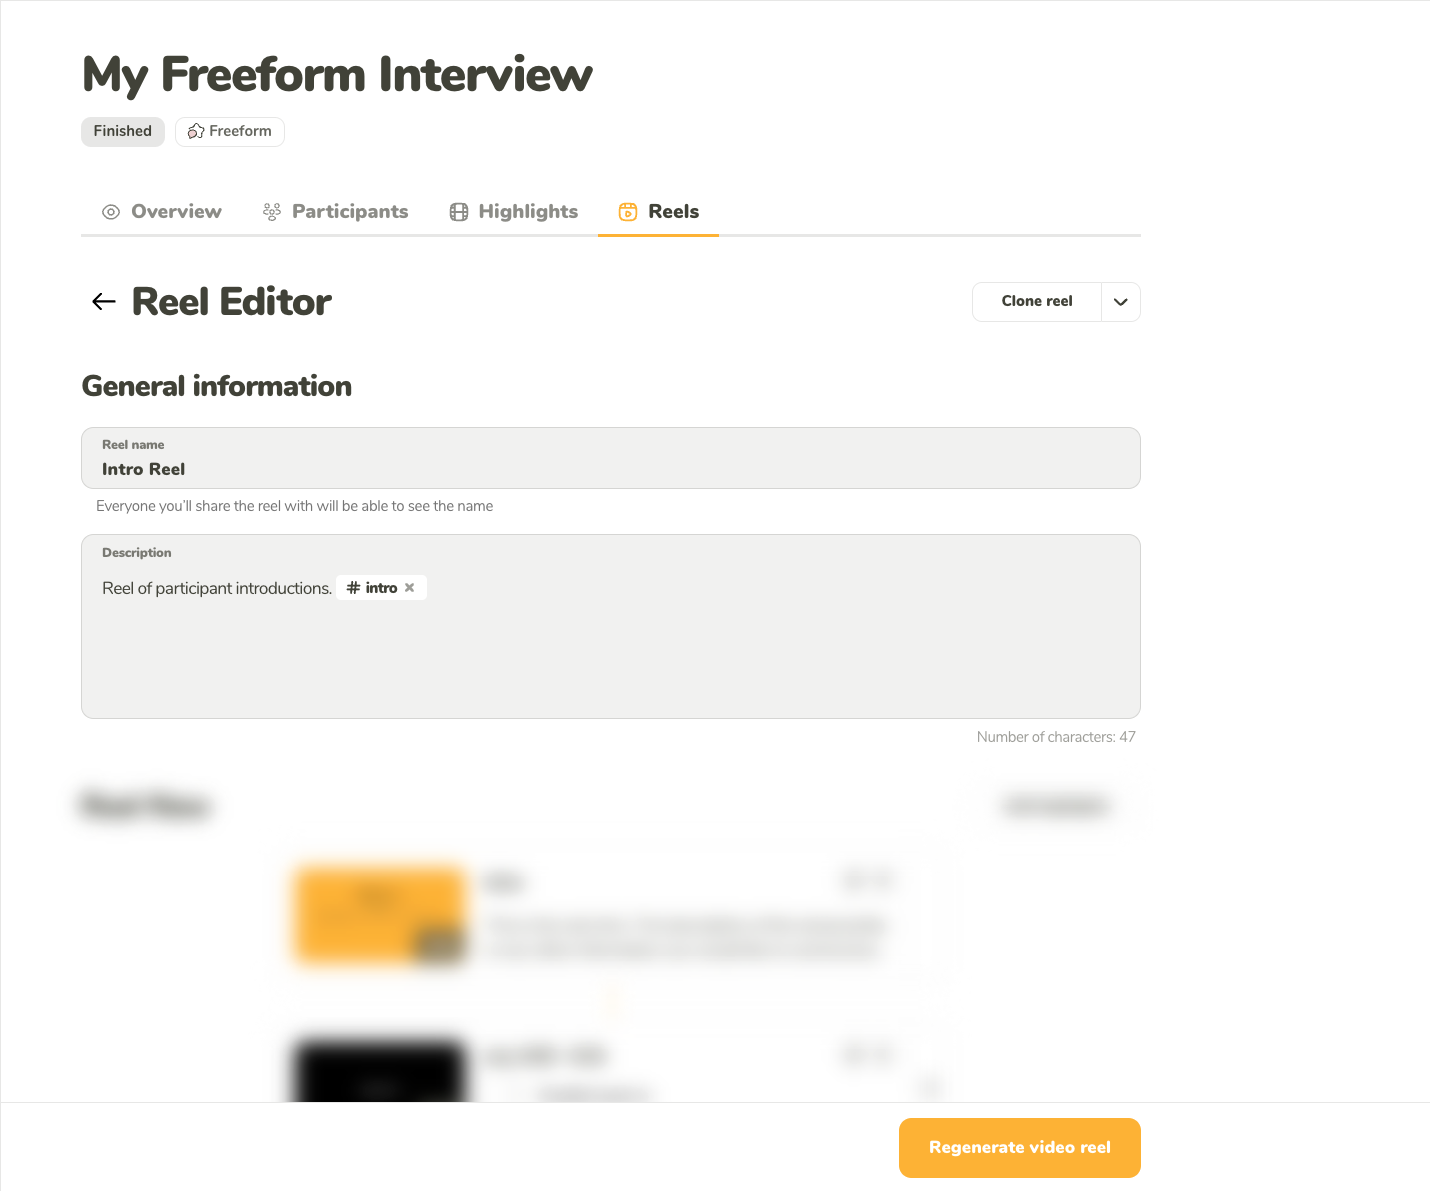
Set the name and the description of the reel.
The most important part of the reel setup is, the flow, or differently said, what is included in the reel and in what order. The reel can have the following parts:
Highlights are the core of your reel and are required. You need to include at least one highlight to create a reel.
Lead-ins introduce each highlight and help set the stage. You can add a title and text for each lead-in and adjust its length. For ease, you can use the automatic length feature, which calculates the duration based on the number of words. Lead-ins for each highlight can be disabled as needed.
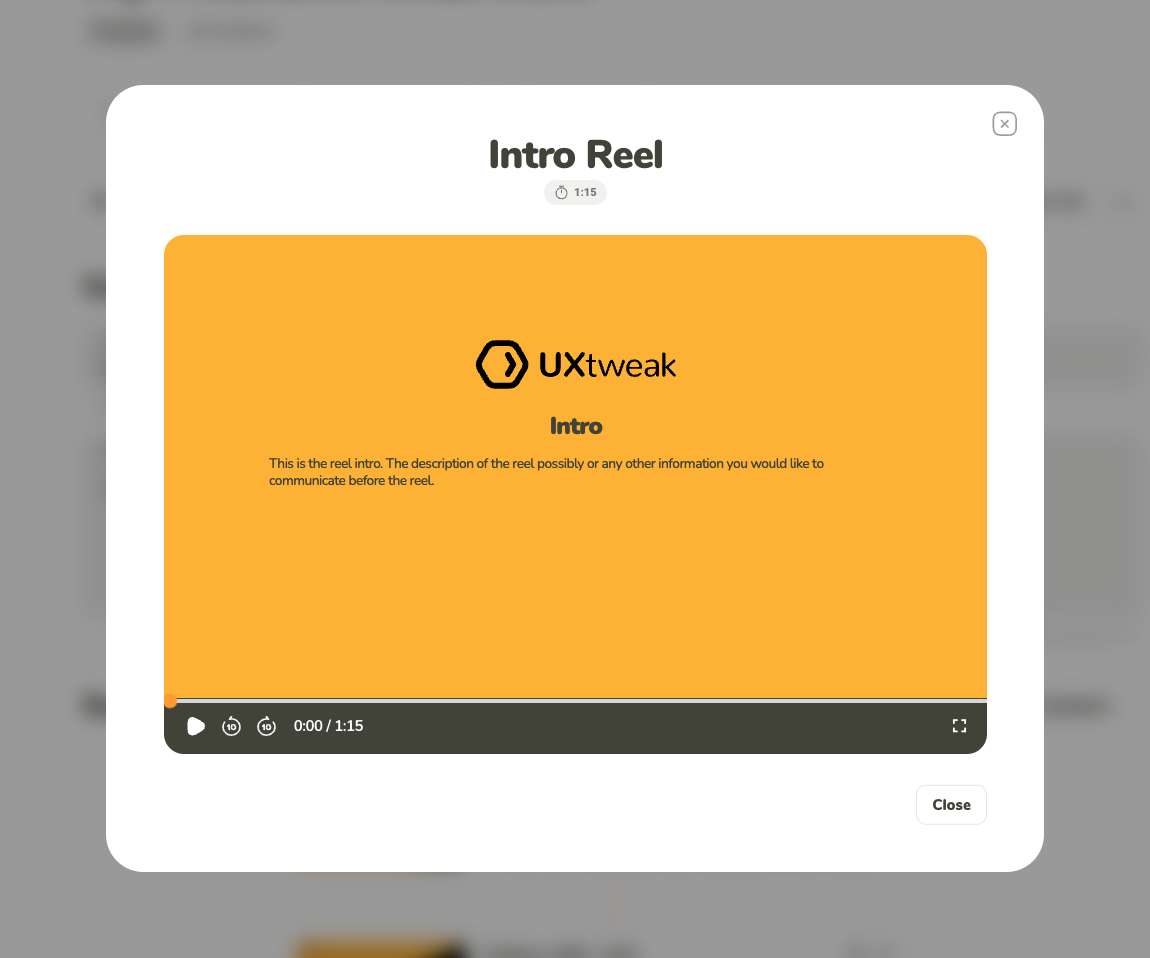
If you want to add a personal touch, you can include an intro and outro. These sections allow you to provide an opening and closing message for your reel. Like lead-ins, you can specify the title, text, and duration for both the intro and outro and an automatic length adjustment is also available.
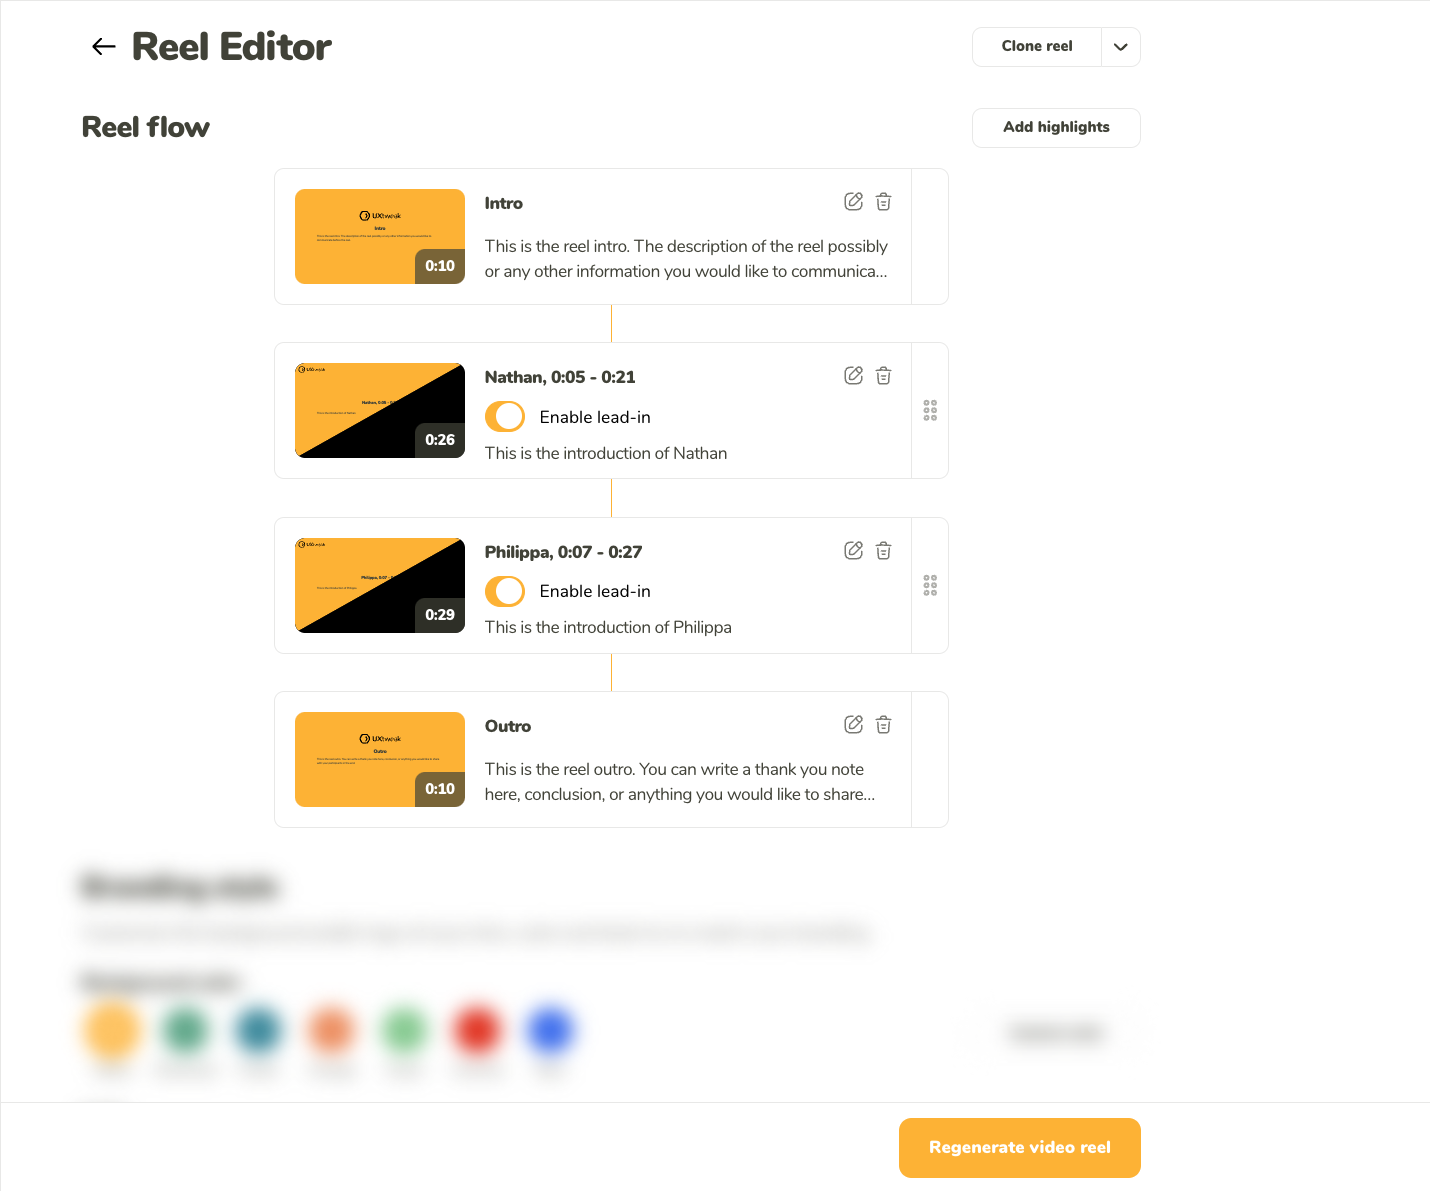
This is how you’ll see the flow of the reel.
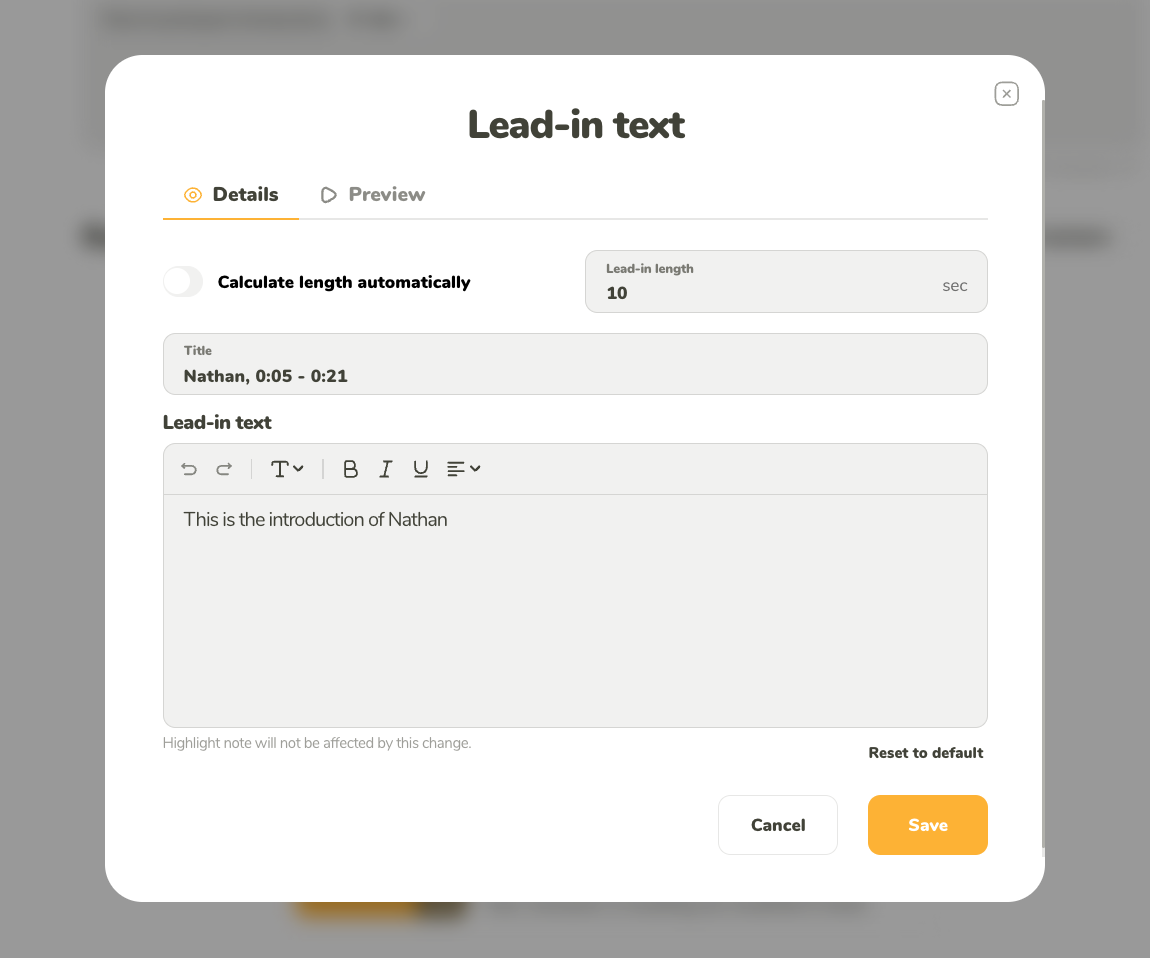
Here you can edit your lead-in details. The same editor is used to edit the intro and the outro.
This section allows you to customize the branding of your reel for enhanced personalization. Below are the options available for tailoring the reel’s appearance to align with your brand:
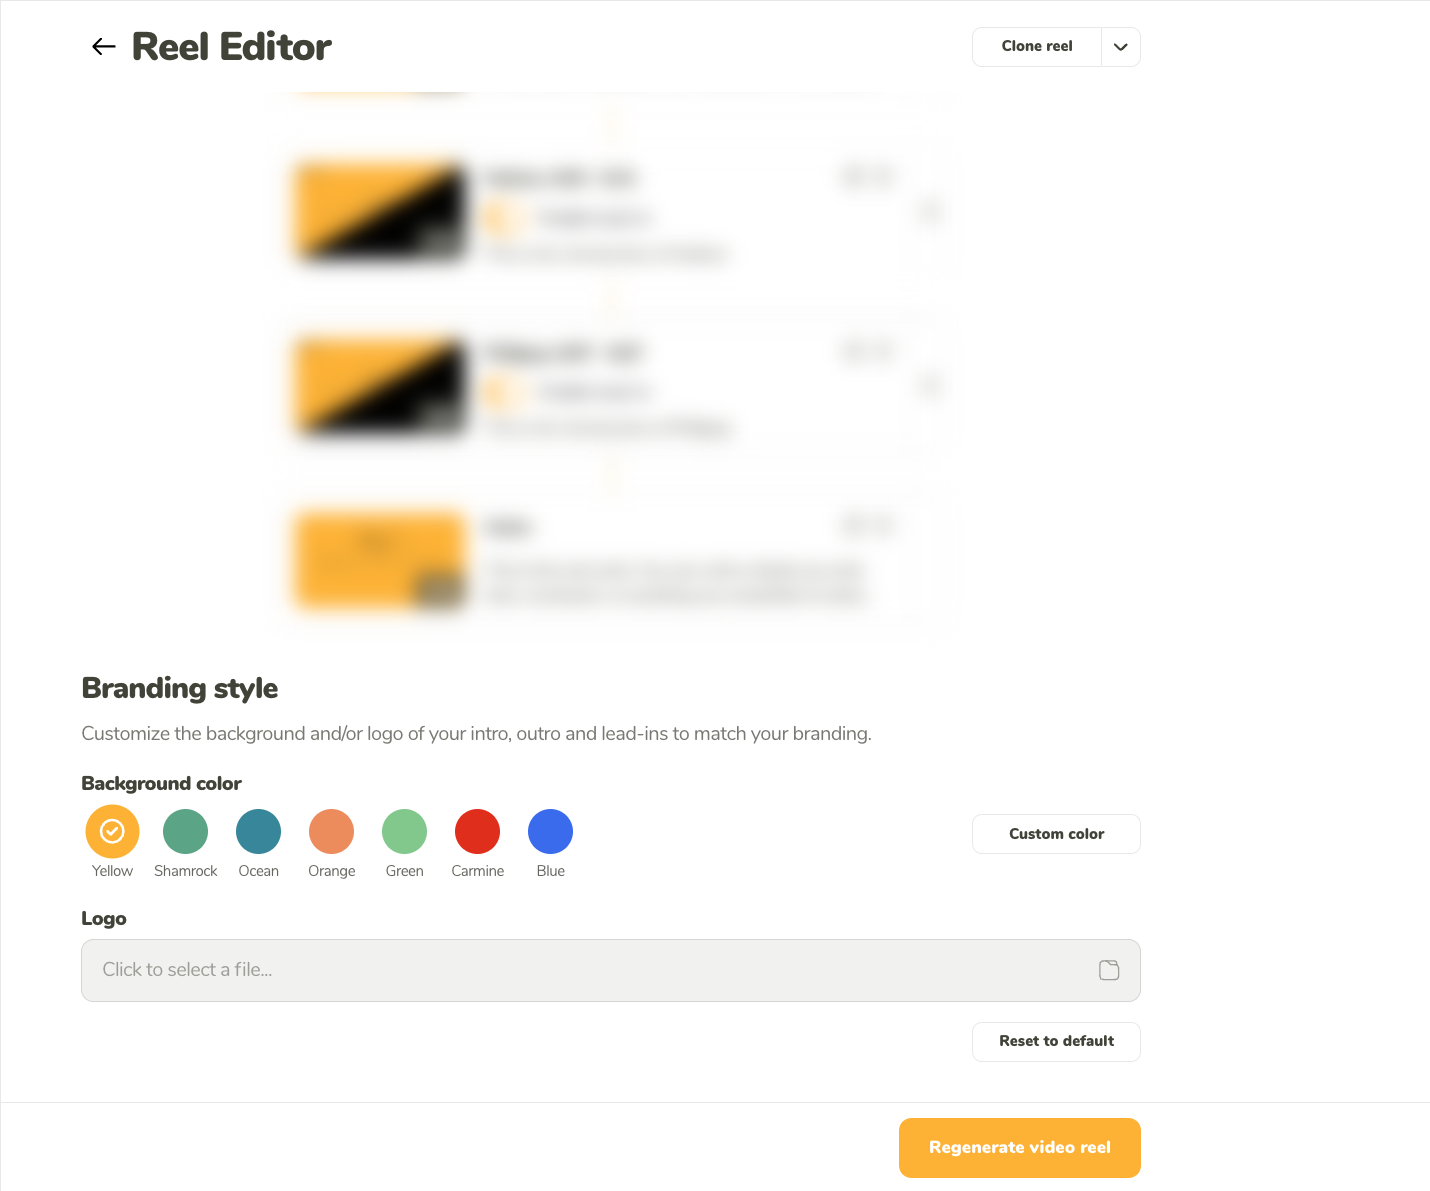
Set the custom look of your reel.
You can preview your reel at any time. On larger screens, the preview is conveniently displayed on the right side for easy access. On smaller screens, simply click the Preview reel button to open a pop-up where you can view the preview.
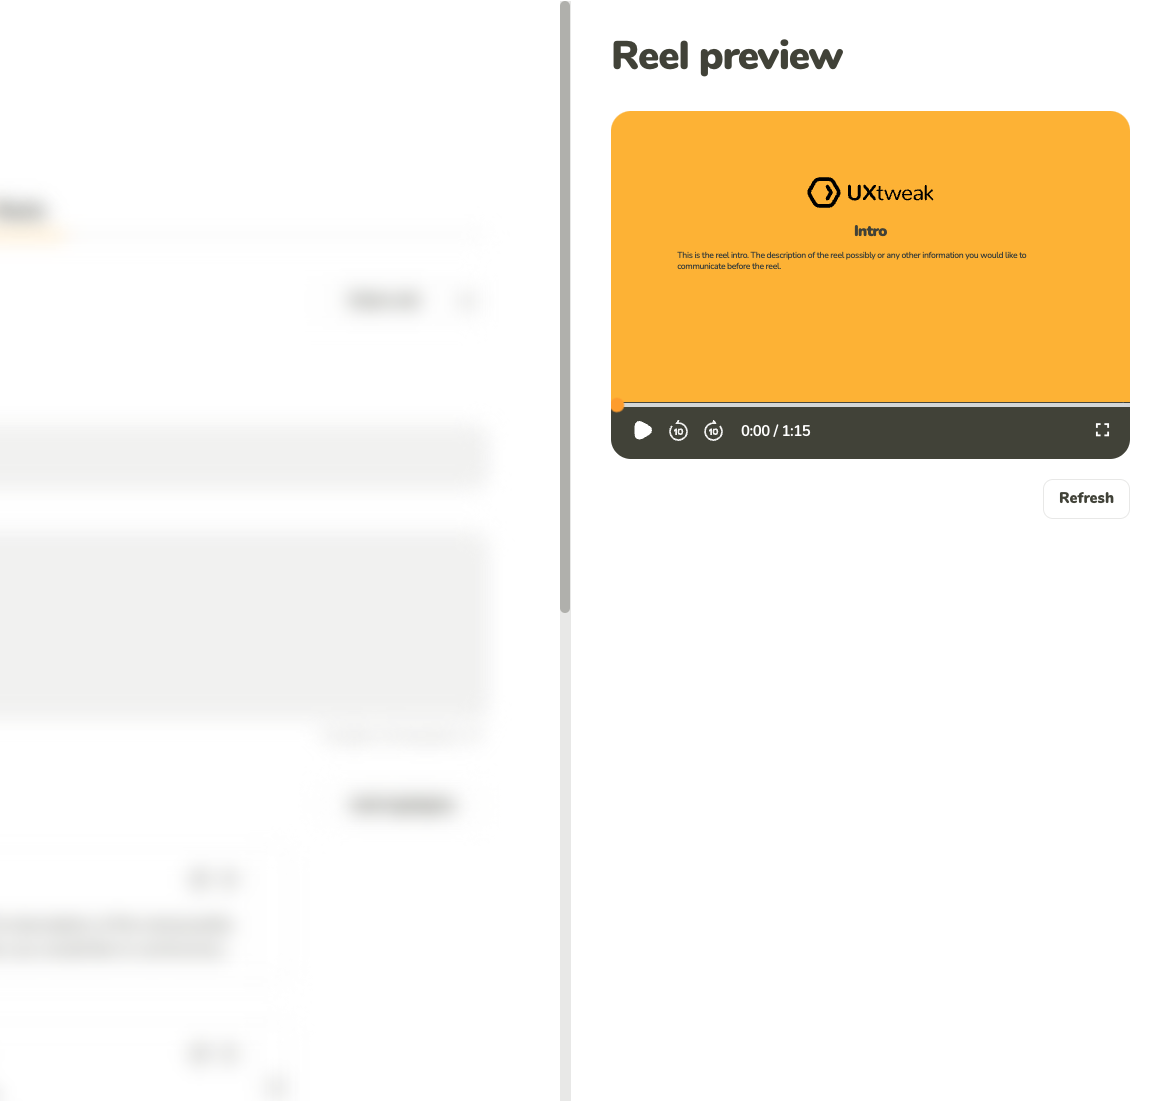
You can see the preview on the right side next to the editor.
You can see the preview in the pop-up.