Filtering options
Filter respondents by their answers, task success rate, interview length, and more.
Learn how to set up and use UXtweak
Explore possibilities with demo studies and results

Export and analyze insights faster. Sync your favorite tools with UXtweak
Resources for mastering research, design and product
Definitions of UX terms and phrases
UX insights and tips to sharpen your skills

Studies published in peer‑reviewed journals and industry publications.
Watch our quick, educational UX videos
Listen to top researchers share their stories, wins, lessons
This section covers various parts and functions in the Respondents tab including:
The list of respondents is the main feature of the Respondents tab. These are all the people who participated in your study. Each respondent’s entry contains:
After you’ve adjusted which respondents should be included in the analysis, click Recalculate analysis above the list of respondents to apply the changes to the analysis (everything under the Analysis tab).
By default, the respondents are ordered by the time when they participated in the study. You can change this order by selecting a different sorting metric in the Sort by dropdown list above the respondent list. Click the arrow buttons to change the order between ascending (arrow up and descending (arrow down).
The analysis of multiple interviews can be eased by filtering the respondents. You can filter the respondents by:
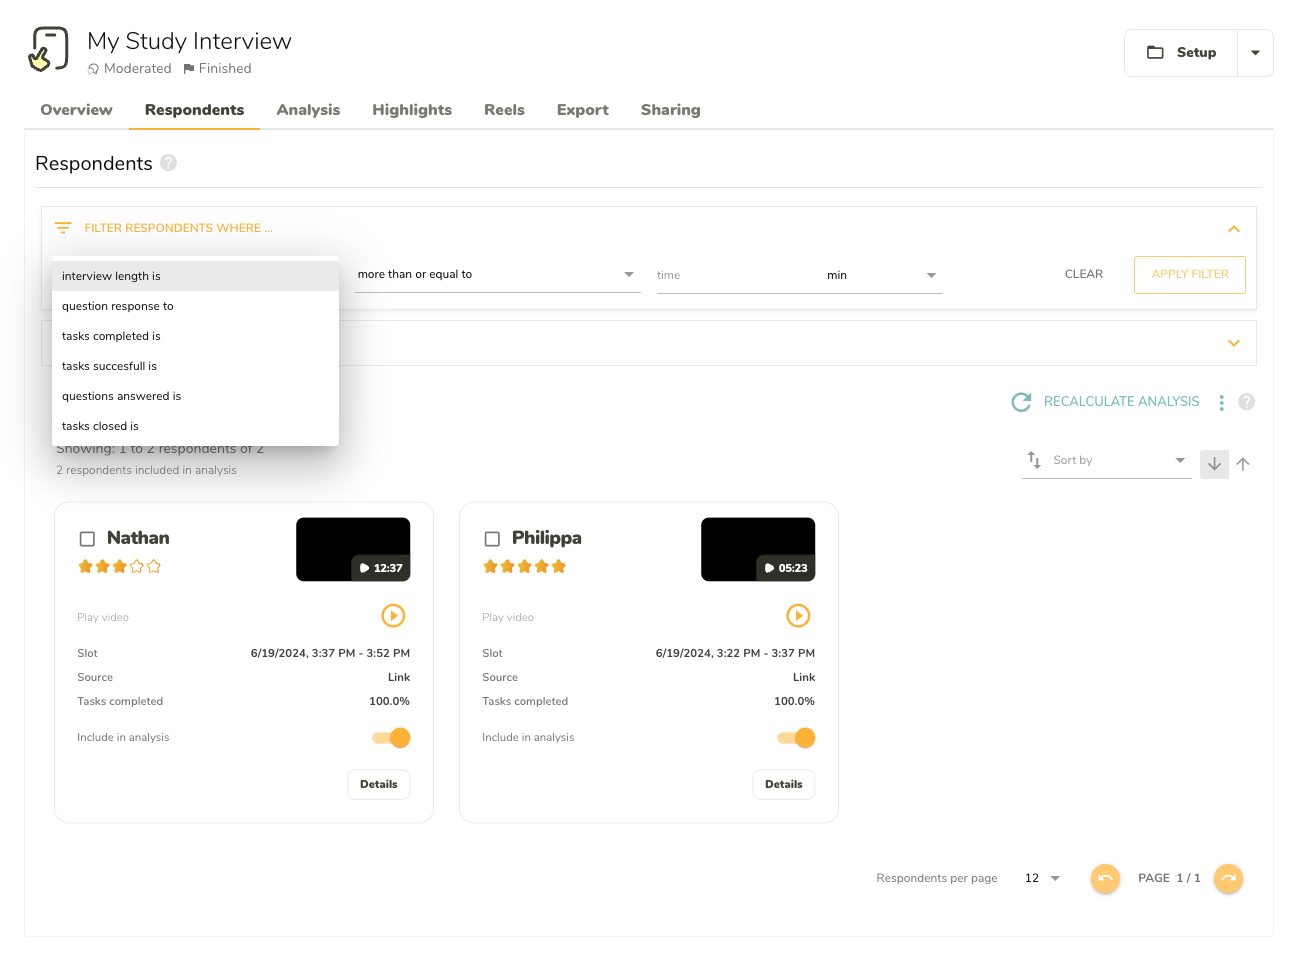
Filter respondents by their answers, task success rate, interview length, and more.
In moderated studies, participants who receive a screenout in the screening questionnaire can be viewed in the participant list.
When at least one participant is screened out, a toggle appears in the dropdown above the participant list that allows you to switch between:
Accepted and screened-out participants are displayed in separate lists and cannot be shown together.
This option works the same way in Study interviews and Freeform interviews.
The respondent’s details can be accessed after clicking on the Details button on the card of the respondent.
The details are split into multiple tabs:
In this tab you can see the general information about the respondent including:
You can also edit the summary of the respondent’s interview on this tab.
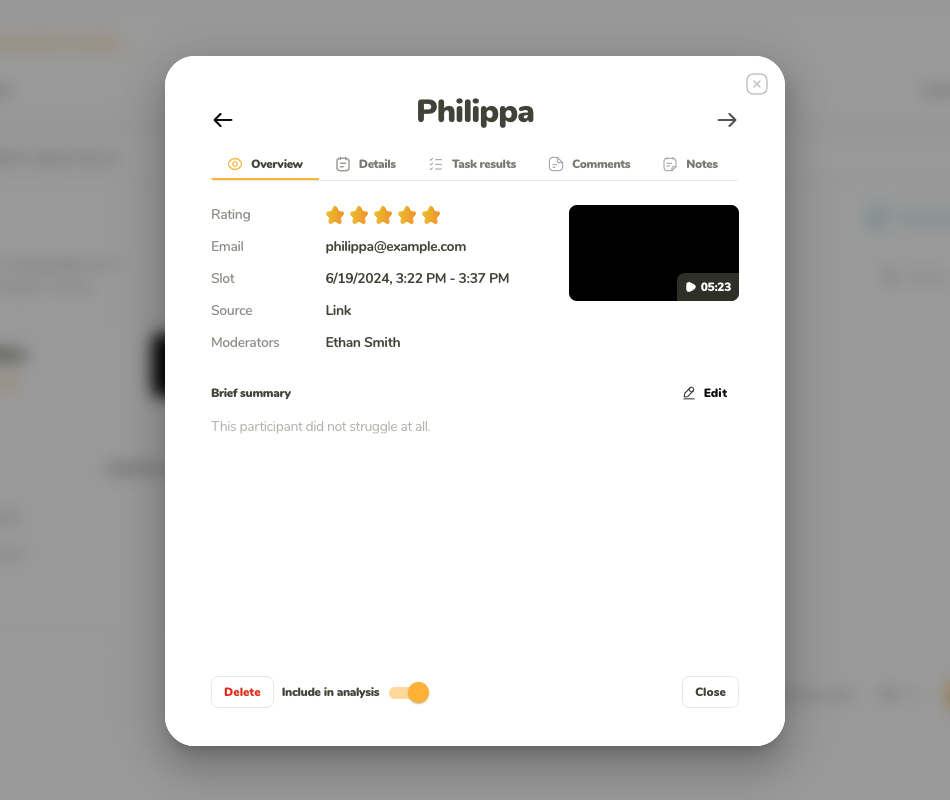
The general information about the participants and their time slot. Edit and review your summary here as well.
Use this tab to see:
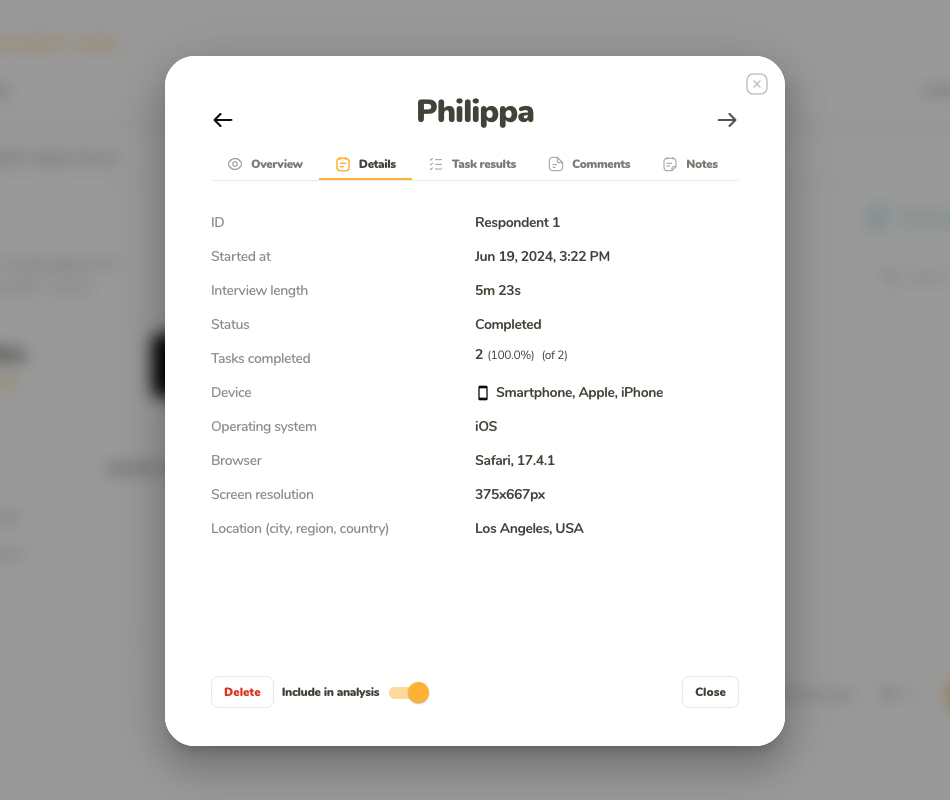
Check the details about the interview, including device information and location.
Available only if the study includes any questions.
Select the questionnaire you want to see answers for:
After selecting Questions after the task, select the task the questionnaire you’re interested in is related to. Either use the task selection dropdown list or use the arrow buttons on the right and left sides of the task selection dropdown list to move between tasks one at a time.
The question results show the respondents’ answers for each question, as well as the question text and the list of available options (in case of multiple-option questions). If you include Skip Logic in your questionnaire, it is important to differentiate between:
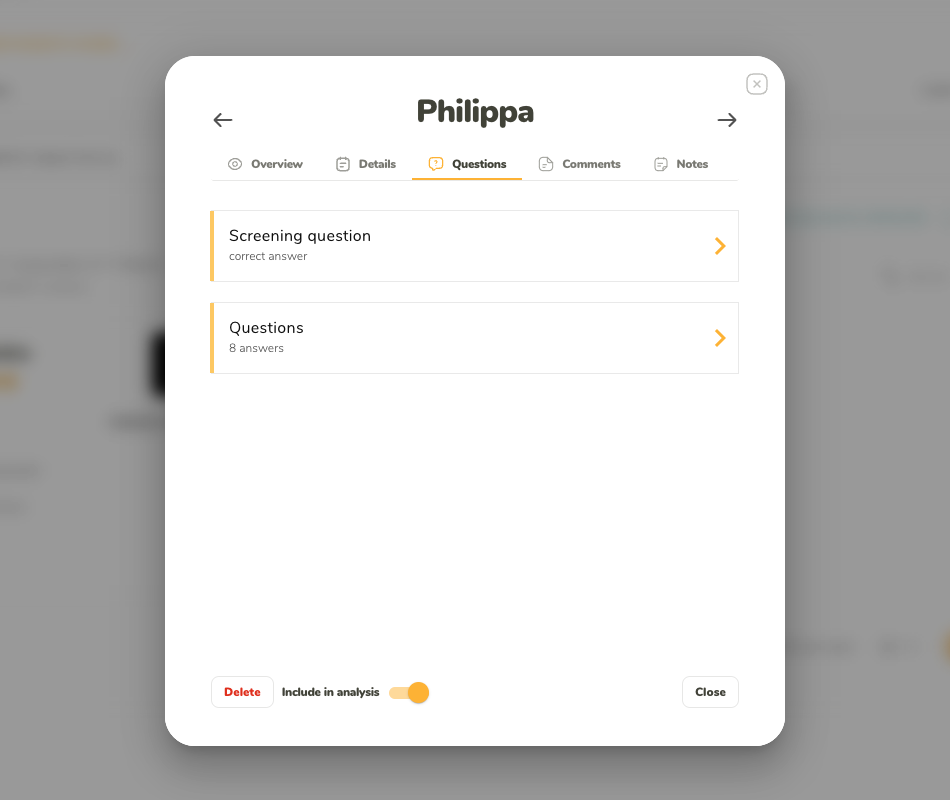
If your study contains any questionnaires, you can see the answers provided by the respondent here.
On this tab you can see all notes for the interview. Each note has a time stamp and an Author.
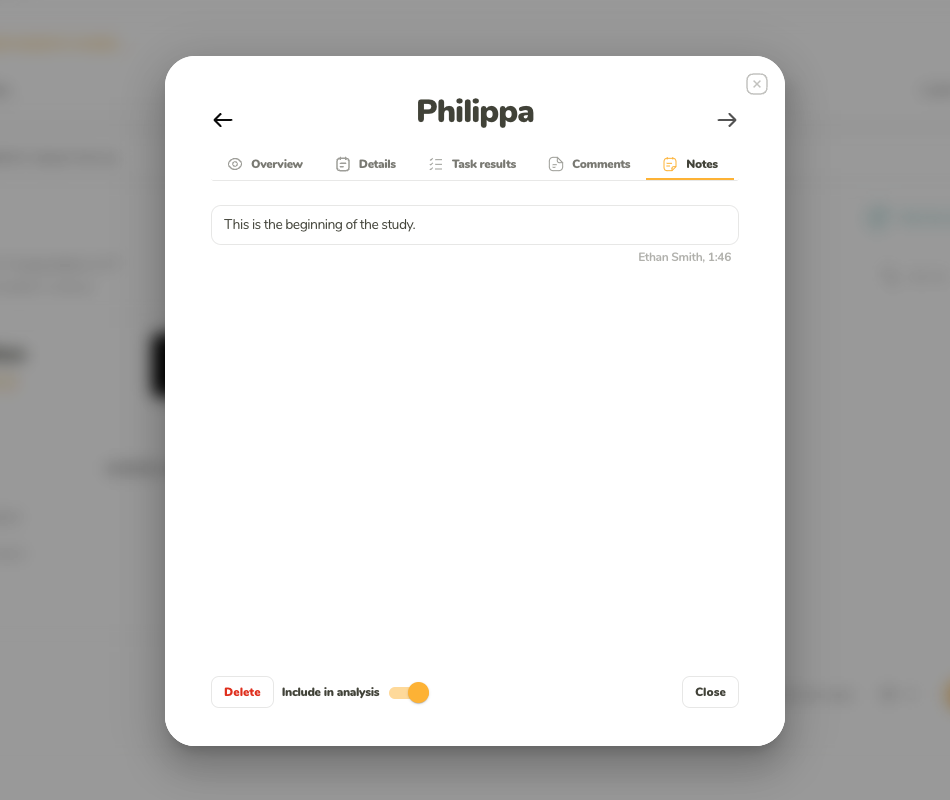
Review all notes added to the specific interview.
The comments left by the respondents during the study. Each comment contains text and information about the step of the study during which it was submitted.
Depending on the type of the study, there might be additional tabs in the detail of the respondent. An example of this would be Task Results in the case of Website Testing.
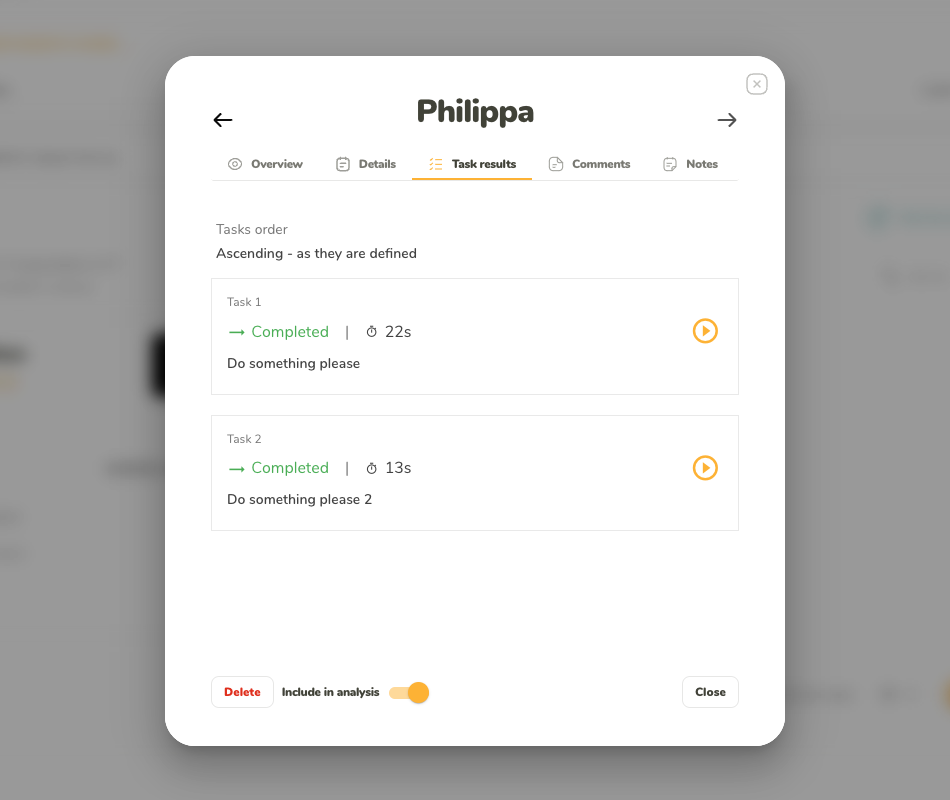
Different tabs are added with the study-specific results, depending on the study type.