
When developing a product, application, or website, it’s always a good practice to create several different designs first. But how do you know which design users will prefer? How to choose which design to further develop and where to invest your time and energy?
A great option is to obtain feedback straight from your users by conducting preference testing.
In this guide, we will explore the essence of preference testing, its pros and cons, and the different options for customizing your preference test.
We will cover the steps required for executing a preference testing study, as well as some options for looking at the obtained data.
What is preference testing?

Preference testing is a research method used to establish user preferences toward design options. Participants in the study are presented with 2 or more alternatives and asked to choose which one they prefer.
These tests are commonly used to determine which designs are the most aesthetically pleasing, understandable, or evoke the most trust.
What can preference testing be used for?
A preference test can be used to determine the preferences for a logo, icon, color palette, design, mockup, content piece, copy, text style, etc. This type of user research helps create a better understanding of what consumers want and design products better suited for them.
When redesigning a webpage, for example, you can present your users with 2 different design versions.
They will choose which one’s the better match for their preferences and they might leave some comments (if you give them the the opportunity to do so through a post-study questionnaire).
This will help you make a well-informed decision about which design version to implement, or at least in which direction to move forward with.
When should you conduct preference testing?
Preference testing is most effective in the early design phase and early stages of prototyping, before you spend too much time and effort on development.
It allows you to decide where to focus your resources, which choice is the most practical, and how you may improve it. You can also use preference testing to compare your designs against the competitors’.
What are the advantages of preference testing?
👉 It’s a quick and effective way to get feedback from your target audience
👉 Simulates what users do when purchasing products or services – choosing from a variety of options
👉 Simple and easy to understand, making them appropriate for even younger audiences
👉 Ability to get both qualitative and quantitative user feedback
What are the limitations of preference testing?
While preference testing is a wonderful way to validate design changes and collect preference information from users, it still has a couple of limitations. To get the most out of preference testing, you have to be aware of them and consider them while setting up your studies.
⚠️ Limitation 1 – You don’t measure how much users prefer one design over the other
During preference testing, you do not collect the information regarding the size of the preference participants have.
For example, when you ask your users to pick a favorite design, it’s possible that they might like both designs. Since they have to choose, they will choose the one that they prefer slightly more. However, they might still find the second design almost equally acceptable.
The situation might also be reversed. You might present users with 2 designs, and they will find both of them unappealing. However, since they still have to choose, they will select what they see as the “lesser evil”. A preference by itself does not signify that they actually like the design.
To deal with this limitation, we advise using preference testing in conjunction with other research methods, such as interviews and/or post-study questionnaires or surveys. You can also use it in tandem with A/B testing and behavioral analytics to gather more quantitative results.
This will help you collect deeper insights and data that can help define the reasons behind participant decisions.
⚠️ Limitation 2 – Preference testing is not A/B Testing
Another issue is that some people tend to confuse preference testing with A/B testing. Let’s discuss how these UX research methods differ.
What is the difference between preference testing and A/B testing?
Preference testing is used early in the development phases and asks participants to indicate preferences based only on a brief inspection of the design; they generally do not interact with it.
On the other hand, when conducting A/B testing, participants interact with several different variants of a functioning prototype.
Usually, one half of the participants are introduced to version A of the prototype and the other half to version B. They are asked to perform tasks using these prototypes (i.e., finding a product on the page, registering for a service, etc.).
The two options are then compared based on user performance. Here is a handy comparison table for preference testing vs A/B testing:

🔽 Try UXtweak’s A/B Testing and Preference Testing tools yourself in these demos!

Make sure you clearly understand what your research goals are and what development stage you are closer to, so you can choose the right testing method.
If you want to learn more about the difference between preference testing vs A/B testing, you can watch our video guide below.
How to conduct a preference test?
Let’s go step-by-step through the preference testing process.
📍Set your objectives
Firstly, make sure you know what kind of information you want to obtain from your users and why.
Are you creating a new product or redesigning an existing one? Do you have two or more possible designs? Based on what criteria should participants pick their preferred design? Are there any company values that the design should emphasise?
The answers to these questions will determine what kind of instructions you should give, what designs you are going to compare, who are going to be the participants, and what follow-up questions you should to ask.
📍Gather materials
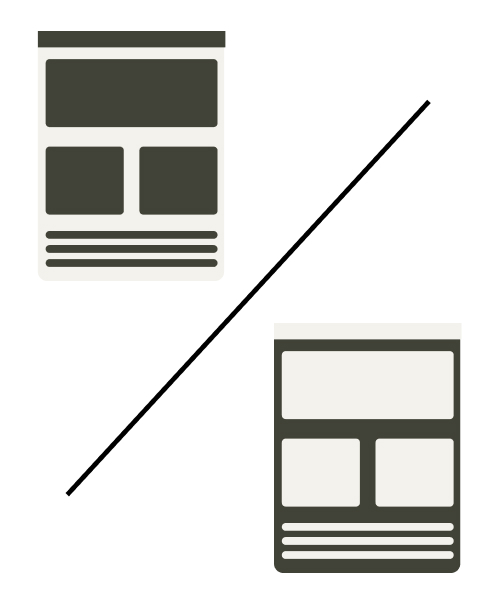
Whether it’s website or app design variations, creative logos, symbols, or color palettes, you have to prepare the materials you wish to use for your preference testing.
In most preference tests, two or three options are usually utilized, but you can use more if you wish. However, be aware that the more designs you include in a task, the more difficult it will be for your participants to choose, remember them and then justify their choice.
Your preference test design options don’t need to have the same size or shape, or be in any way similar. On the contrary, the more similar your design concepts are, the harder it will be for the user to choose. The differences should be visible with one look.
📍Create the tasks
The tasks you create should fit your objectives. It is always good to give participants some background. For instance, when you are comparing two different icons, don’t simply ask “Which icon do you prefer?”.
Try to give participants context. For example, you could ask: “Which icon do you prefer for incoming messages?” or “Which icon do you find more trustworthy?”.
More in-depth, detailed questions allow you to evaluate your hypothesis with higher precision. However, avoid creating leading questions that might introduce research bias.
People are generally trying to be agreeable, and if they have a suspicion you yourself prefer one of the designs, it may affect them.
They also tend to be less critical, even if instructed to be as sincere as possible, so it may sometimes be useful not to ask direct questions to find out why they prefer one design over another.
📍Create follow-up questions
Follow-up questions are a good way to gather more qualitative data from participants, so you can make better-informed decisions.
For example, when you are comparing more than two designs, you will get the information about the preferred design, but it may be useful to include ratings for each design to ascertain the degree of preference.
You can use a Likert scale question for each design, asking “How visually appealing do you find design A/B/C?”. You could also ask your users to identify not only the preferred design but also the least preferred design.
Here’s an example of a Likert scale question shown to participants after a preference test:

You can also ask your respondents why they chose the preferred design or what they like/dislike about the preferred design using a free-text question.
Another possibility is to create a list of adjectives – for example, the characteristics that you want to associate with your brand – and ask respondents to mark those they feel are related to their preferred design.
Alternatively, if you don’t want to restrict your respondents to a set list of adjectives, you can ask them to share their own words to describe the design.
📍Gather respondents
The respondents should reflect your customers, the ones who will eventually interact with your designs. The best approach is to speak directly to those who use – or are expected to use – the product or service and are aware of the context in which the designs are presented.
How many responses should you gather for a preference test?
The number of respondents you need will depend on the number and complexity of the designs that you’re comparing, as well as on the nature of the follow-up questions.
One of the recommendations is to get at least 20-30 respondents. You may find out that the responses are highly repetitive, even with a smaller sample.
On the other hand, if you’re comparing many designs or asking complex questions, you may need even more than 30 respondents to see patterns emerge.
Don’t forget about the incentives to thank participants for their time and input.
📍Analyze the results
The fundamental information you will receive from a preference test is the number of times that each design was chosen as the preferred choice. This information is displayed as a total number as well as a percentage.
It may well happen that none of the designs turns out as a clear preference, or that the preference is not statistically significant. In this situation, you can repeat the testing with the same respondents.
Experience and research show that it isn’t unusual for people to change their preference from trial to trial. In case you get the same results even after repeated tests, you may wait for new iterations of the design for both options and use those to repeat the test.
For analyzing qualitative data from follow-up surveys, you have several options. Where applicable, you will again get frequencies for different answers. For free-text questions, you can group participants who preferred the same design and look for similar answers and patterns.
Best online preference testing tool list
Now that we have gone through the steps of preference testing, let’s take a look at the best preference testing tools on the market.
For each tool in this article, you will find:
- A short description
- What features for preference testing are available
- Recruitment options
- Pricing
1. UXtweak

UXtweak is an all-in-one UX research platform that is perfect for various UX research projects. With UXtweak’s Preference Testing tool, you can gather participants’ feedback and preference data quickly, effectively, and with real users, even if you don’t have an active user base. Simply use our Onsite Recruitment or outsource all recruitment-related activities to us with our User Panel.
With UXtweak, you can:
👉 Use preference testing to test images, text, and audio
👉 Set up the tasks effectively
👉 Write messages and instructions for participants
👉 Create pre-study and post-study questionnaires with any text, images, or links
👉 Customize the test and use your own brand colors and logo
Try Preference Testing with UXtweak from the participant’s perspective through these demos! ⬇️

Recruitment Options with UXtweak
When it comes to recruiting participants for your preference tests, UXtweak offers three primary options:
- Share a study link with your own participants.
- Import your user database intof Own Database to use our CRM-like functionalities
- Recruit testers from our cost-effective User Panel of over 155 million users with 2000 profiling attributes.
- Use our handy Onsite Recruiting widget to turn your website visitors into participants in your preference test
UXtweak pricing
There is a free forever plan for small-scale projects, and the Business plan starts at 92$ / month, where you get unlimited tasks and participants, access to all main tools, custom branding, and PDF reports. For more information, see UXtweak pricing.
2. Lyssna (previously UsabilityHub)

Lyssna is a remote user research platform with different testing tools to validate any design decision on videos, logos, packaging, or animations. Preference testing by UsabilityHub offers a simple interface with a few basic functions.
With Lyssna, you can:
- Add a welcome and final screen
- Add designs to be tested
- Write follow-up questions
- Calculate statistical significance when comparing two designs
Recruitment Options
Lyssna allows you to recruit respondents in two ways:
- Share a study link with your own testers (at no additional cost)
- Recruit participants from their 340K+ user panel
Lyssna Pricing
A free version is available only for testing that lasts a maximum of 2 minutes and you can collect 15 self-recruited responses. The Basic plan costs $89/month, where you can test up to 5 minutes and have 15 self-recruited responses.
The Pro plan costs $199/month and offers multi-user plans, unlimited length for surveys and tests,and custom branding.
Check out the reviews, features and price of Lyssna.
3. Useberry

A user testing service that offers several tools for user testing, such as a preference test. With their tool, Useberry recommends testing of microcopies, CTAs, and design variations.
With their tool, you are able to:
- Select a preference test stimulus type (image or text)
- Create a task
- Add follow-up questions
- Include intro and thank you screen
Recruitment Options
For testing in Useberry, you can either bring your own testers or recruit from Useberry’s 240K user panel.
Useberry Pricing
With a free plan, you can collect up to 10 responses a month and have 1 active project. When you need more, there is an option for both annual and monthly subscriptions. The Growth plan starts at $67/ month, offers 1 seat, and allows you to collect 300 responses per month.
Find more information in our Useberry comparison.
4. Maze

Maze is a remote user testing platform that allows you to test designs, prototypes and copy with their preference test. It gathers user feedback in one place and collects actionable insights across the teams.
Maze allows you to:
- Build your test as you want, block by block
- Choose from pre-made templates
- Include a welcome and final screen
Recruitment Options
With Maze, you get access to their 70K+ user panel where you can recruit targeted testers, or, alternatively, just bring your own testers.
Maze pricing
Maze, like all the platforms above, has a free version, allowing you to have 1 active study a month. The Starter plan is an annual subscription only, and the pricing starts at $1188 a year (or 99 per month). Learn more in Maze reviews.
Statistical significance of the data

To ensure the reliability of the results you collect during preference testing, you have to have statistical significance. Statistical significance is the likelihood that the best design reflects user preferences on a larger scale rather than determined by random chance.
The level of significance depends on the sample size. The larger the sample size, the more relevant the results.
To be statistically relevant, preference tests should be carried out with at least 20 users.
You should also consider the specific circumstances and viewpoints relevant to the design at hand. If you’re testing a design to attract potential leads, you could also try to draw in non-customers who fit your standard user’s profile in some way.
Preference test questions
The questions you will ask will always be highly tailored to your situation; however, here are some great preference testing example questions you can ask:
💬 Which version of the homepage evokes more trust in you?
💬 Which font type and size do you find more comfortable to read?
💬 Choose an icon that, in your opinion, more closely represents “volunteering”.
💬 Which color scheme do you prefer for this app?
💬 Which version of the notification design do you find more attention-grabbing?
💬 Which menu style do you prefer for this e-commerce website?
💬 Which version of the button copy do you find more compelling?
💬 Which layout is more intuitive for navigating through the app’s features?
💬 Which product listing format do you prefer – a grid or a list view?
Preference test example
Having an example while preparing your own preference test can be quite helpful. We have prepared a couple of demo tests in UXtweak’s Preference Testing tool that might help you prepare for your own study.
With our preference test examples, you can check how preference testing works from the participants’ side, how you can organize the tasks, and what follow-up questions you can ask participants.
Click on the images below to check our preference testing demo studies.
👉 Preference Test Mobile Demo Videos
What is stopping you from trying preference testing?
When it comes to design research, preference tests are one of the easiest ways to get quick and actionable feedback from your customers.
It’s important to test your ideas with your prospective users and not to rely solely on your own assumptions when it comes to designing a stellar product.
UXtweak is here to help you get started. So, don’t wait around – register for free today and try your first preference test right away! 🐝