There are many ways you can visualize a user’s interaction with the product. Some of them include experience maps, journey maps, empathy maps and user flows. However, there’s one more that we’d like to specifically focus on in this guide – UX storyboarding.
Storytelling is a huge part of the UX design process and it’s also a baseline of storyboarding in UX. It allows design teams to understand the user better, visualize their journey, look at the product from their point of view and helps to present their findings and problems to clients and stakeholders.
What is storyboarding in UX?
UX storyboarding is the process of visualizing your user’s interaction with the product in the form of a storyboard. A storyboard represents the sequence of events in the form of pictures or sketches, where each separate picture is a specific action. It’s a great way of storytelling that is often used in the film industry and serves as a visual script.
In UX, storyboarding is used by design teams to better understand users’ actions and explain them to others, visualizing the steps of their interaction with the product together with short descriptive captions. The captions should provide all the necessary context, but the main focus should be on the pictures. This makes a UX storyboard different from other techniques mapping out user-product interactions, such as a user journey map.
When to use UX storyboards?
UX storyboarding is usually performed after the ideation stage of the design thinking process.
At this stage, you’re looking to uncover gaps in your thinking before the prototyping process begins. Looking at the user’s actions through a UX storyboard allows you to fill in those gaps, notice non-obvious details and define the parts of the user’s interaction with the product that you need to focus on in your design.
Storyboarding is useful when there are multiple parties involved in the design process. Meaning not only designers and researchers, but also stakeholders, developers etc.

Why use storyboards?
The following are some of the benefits of UX storyboarding:
Prioritization
Storyboards help teams to understand which problems and features are worth focusing on and which ones will be a waste of time. They allow teams to prioritize the features that actually matter, and get a better look at users’ behavior when dealing with them.
User-centered approach
As mentioned earlier, UX storyboards are one of the ways of visualizing the user experience and their journey when dealing with your product. By carefully examining each part of the storyboard you’re able to design a product with a more user-centered approach, empathize with users more and understand how and when they use certain features.
Easy collaboration
In participatory design, when all parties are involved in the design process you’ll often need to present your findings to those who were not present at the usability test, for example.
A storyboard is a great way to visually illustrate how a user interacted with your product, the problems they encountered, and demonstrate their body language, facial expressions, and even comments. It will help stakeholders to better understand the issue and your proposed solutions.
Iteration
Because UX storyboarding is usually conducted at the beginning of the design process it leaves a lot of room for future iteration, allowing to change ideas and test various concepts at no cost. After all, you can create a basic storyboard with just pen and paper, and some sticky notes. Such a low-maintenance approach makes it easy to create more storyboards if needed, or rewrite the existing ones.
How to create UX storyboards?
Creating a storyboard is not only informative but can also be a very fun activity. It’s like drawing a comic, only about your users.
Here are 5 steps you need to take to create a UX storyboard:
- Do some research
- Pick a scenario
- Start outlining your story
- Add details
- Add the visuals

Now, let’s take a closer look at each of the steps.
Do some research
To accurately visualize all users’ interactions you’ll need to get to know them better and gather some data on how they use your product. As usual, we recommend starting with user research.
There are several UX research methods you can use to get more information about your users. Depending on whether or not you already have the product, some of them include user interviews, surveys, usability tests etc. Choose the one that suits your needs best and aligns with the goals of the project.
Pick a scenario
Choose the scenario for your storyboard. What specific part of the user’s interaction with your product do you want to visualize? Be specific, so that you don’t end up with a 3-page storyboard describing 3 different situations. It should be informative, not long.
You can create multiple storyboards for different scenarios and their outcomes. You may want to first visualize the positive experience in one storyboard and then the same situation but with a negative outcome. This will help to get a better understanding of why the user was unsuccessful in completing the task and how you can change it with your design.
Start outlining your story
Think through the main events that happen in your story. Define details like:
- The Main Character
Who is the main character in your scenario? What do you know about them? Most of the time this person will be one of your target personas so you won’t have problems gathering info about them. As not all users are created the same, we recommend creating unique storyboards for each persona, to better represent all your users.
- The narrative
The list of events occurring throughout the whole story and specifically at each of the steps. What does your main character go through, at what stage do they start interacting with your product, what are the problems they encounter?
- The scene
Specify where your main character is at the moment of the story, where does it take place?
Add details
Now that you have the skeleton of your UX storyboard ready it’s time to enhance it with some details. Caption each part of the story, and provide an explanation where needed.
You can even use emoticons to describe the user’s feelings at each part of the story. This will make your storyboard more informative and provide more context for other team members.
Add the visuals
The final part of the process is to create the visuals. You know exactly what’s going on at each stage and how it makes the user feel, now you just have to draw it. If you’re using pen and paper, we recommend drawing each step on a separate piece of paper, so that if you mess it up, you won’t have to redo the whole storyboard.
UX storyboards examples
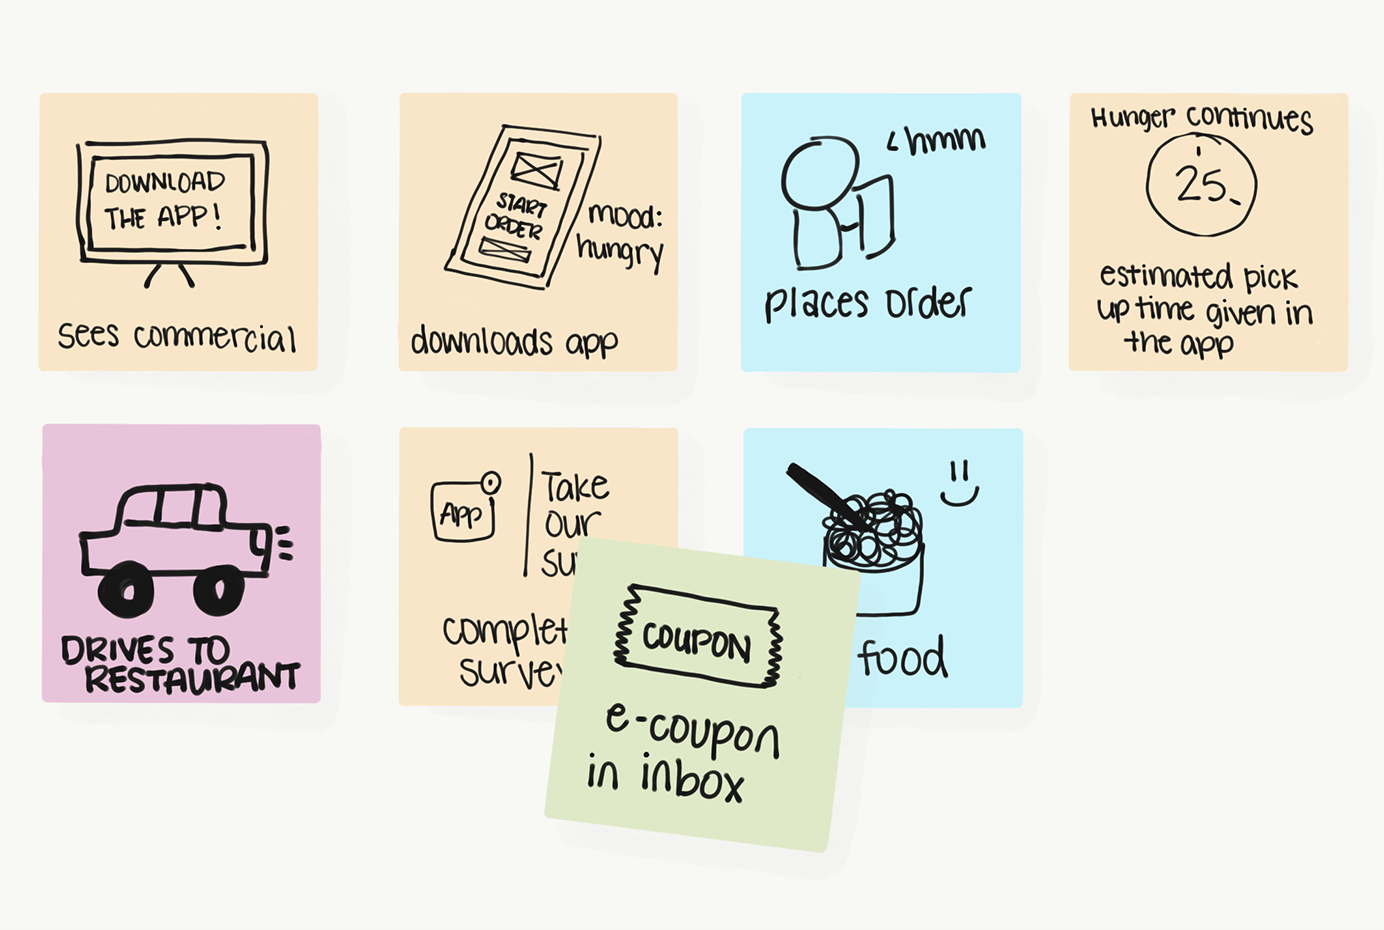
A storyboard doesn’t have to be complex or high-fidelity to illustrate the point. Look at this example of a UX storyboard for a food delivery app.
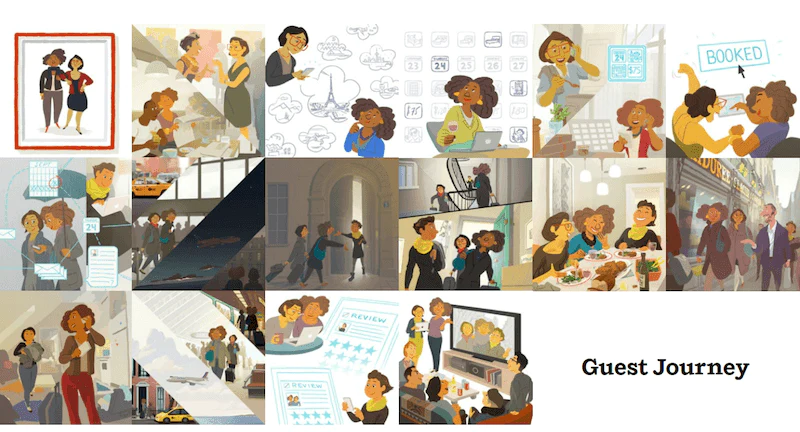
If you want to be more illustrative, feel free to do so, the effect is quite impressive. You can follow the example of Airbnb’s storyboard of a guest journey.
If you want to bring your storyboard online we recommend taking a look at some of the digital whiteboard tools from our UX tools list.